Illustration promotions

>> Tuesday, January 31, 2006

Today my main project is to finish making my illustration promotions. I learned about this in college, while taking graphic design and illustration courses, and a lot of people ask me how this works. Essentially I want publishers to see my artwork, and have my contact information so that they will keep me in mind when it comes time to commission illustrations.

There are other ways to promote your work, online portfolios are popular, and I have my samples on some of those as well, at childrensillustrators and portfolios.com. I chose ones that seem to get good traffic but are still affordable. Sometimes it's a difficult decision, I could get more exposure on a more expensive site, but it's also possible that I'm not what those clients would be looking for. I have only done educational children's books so far, and usually the budget for those projects is much lower than for other types of illustration, particularly editorial and advertising. Educational children's books are sold to schools, and unlike trade books they aren't usually available in bookstores and libraries.

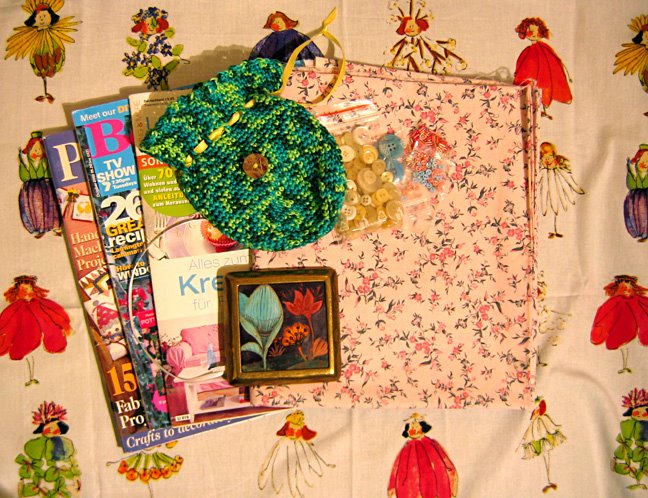
So to add to the online promotion, I send out printed samples to publishers. The main thing these need to include is you artwork and contact information. This contact information should be on everything you send, samples often get passed around and although they usually end up in some kind of folder, it's not always very organized so each piece should have your info. The samples you choose to send should be appropriate to the publisher in style and content. I spend hours browsing around the children's section in bookstores and libraries. You start to get an idea for the style that different publishers are using.

Also, you need to find out where to send your samples. I usually just browse around online. I find the publisher's sites then check if they have submission guidelines. They will usually tell you exactly what they do and do not want to receive. Never send original samples! They are not responsible for returning anything you send. Some even prefer you to email samples, others ask for extras such as a resumé and cover letter. The first time I contact a publisher I usually send a letter, business card and samples, after that I follow-up with cards with recent work.

Don't expect a reply, but if you do get one, it can take months. Also, if they tell you that your work is "on file" that's a positive reply, it means you are in their pool and when the right project comes along they will consider you, but it could take months or even years. I used to send a SASE for a reply but they rarely came back, and frankly I don't need to hear from them if they're not interested. I just find it discouraging!

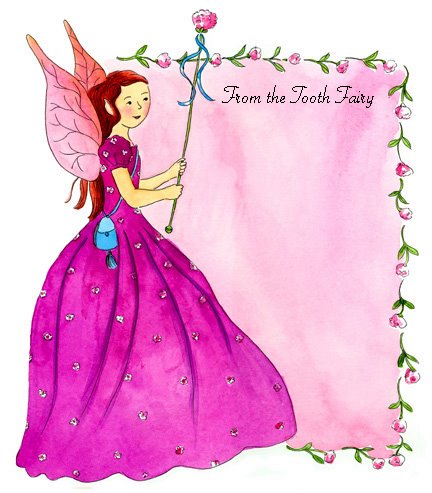
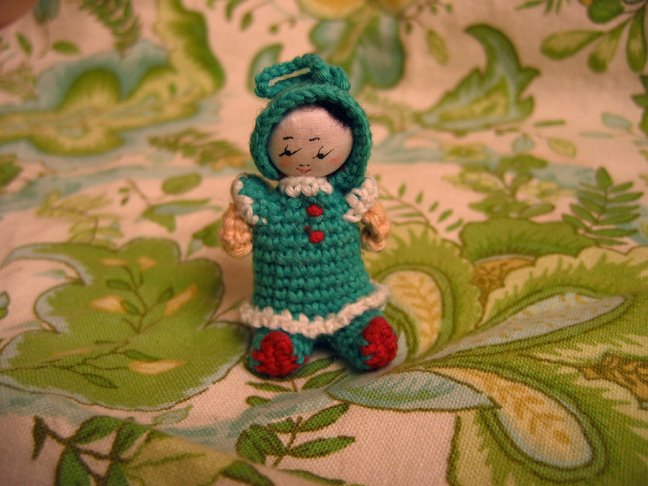
Self-promotion is ideally something you should be doing all the time, even while you're busy with projects, but it can be difficult. I've been putting off sending packages for a long time, because I was so swamped with work. But now that I've just finished a major project it's time to get cracking. It could be a long time before I get any responses, but hopefully I will get other projects from existing clients in the meantime, such as this one I did yesterday for Stargazer Press. They are going to make Tooth Fairy kits!

Read more...

Thrift Shopping - Alluring beauty

>> Monday, January 30, 2006

I love thrift shopping, at Goodwill, Flea Markets, Antique markets, and smaller stores, etc. I found a great little shop called Eclectisaurus (249 Gerrard St. E) on my way to drop off a Goodwill donation last week (I like to keep the cycle going so my place doesn't get crammed too full with odds and ends).

I've been spring cleaning, and sorting through my things now that my latest major illustration project is done and I have some more time. So although I was tempted to buy a charming vintage painted shoe black box, I ended up holding back and just buying this little tin. I thought it might be good for the ATCs I've been receiving, but it's a little bit too small. I love the graphics on it, and of course I couldn't resist it after I noticed someone had scratched "pink beads" on the front. Twice - so there wouldn't be any mix-ups? It turns out it's just perfect for my business cards.

In other news, I'm wondering if colouring my "Twelve Dancing Princesses" illustration could count for this week's Illustration Friday topic: Glamour. I'm finding that I tend to just tweak the topic into what I feel like illustrating! But we looked up Glamour and the Princesses definitely fit the "alluring beauty" definition. So there you go.

Read more...

Pink tropical print bag

>> Saturday, January 28, 2006

I've been meaning to make this for ages, and I've finally gotten around to it. I actually got the fabric from a dress I bought for the fabric alone. It was only $10 on final sale because it was an odd shape and I really don't think it was looking good on anyone. It worked out well because I got the fabric, plus the zipper, plus ties from it, so it was easy to put together the bag.

Please notice that I was ambitious and did actually add a zipper on the lined pocket, and it's even tucked in so that the edges of the zipper don't show inside the pocket. It's perfect for shopping, I can put money and receipts in the pocket and it's big enough for a fair amount of shopping.
We're going to St. Lawrence market today - the farmer's market. I will buy some wild blueberry jam, Fiji apples, and probably some maple sugar candy. And of course I'll be going into the Antiques at the St. Lawrence shop to rummage around through the vintage goods!

P.S. Well although I do tend to get attached to everything I make, I've decided to put this bag up for sale in my etsy shop (partly since I have so many already, and partly because I've sorted through my fabric stash and I now have a plan to make a blue one!) The shop is at clairelmilne.etsy.com

Read more...

Crochet flower brooch and turquoise belt

>> Friday, January 27, 2006

I made a couple of these crochet flower brooches over the past two days. They were inspired by the Flickr Color-iffic swaporama which I'm participating in this month. This is the package I made for my secret partner. The theme for February's swap is pink and red, so I combined a pink mohair yarn with a red cotton yarn to make the flower. The centre is pale pink French knots, with a dark purple French knot in the centre. I'm going to add these to my etsy shop: clairelmilne.etsy.com

I also finally fixed a crochet belt I had which had stretched too much. It wasn't lined and it tied with a knot and it just kept getting longer. Partly because it was made with a stretchy ribbon yarn and partly because of the crochet stitch itself being stretchy. So anyway I can't tell you which yarns I used, because although I carefully save all my yarn labels I can't always remember which one goes with which. When I'm being really clever I staple a little piece of the yarn to the label before saving it.

But here is how you would do it with anything you happen to have around the house:

1. Make a little swatch to figure out how many stitches would make a belt of the right width to go through the belt loops. This one was 7 stitches wide with a G size hook. When you start out leave a tail of yarn to use to sew the belt to the d-rings.

2. Crochet until the belt is around 3 inches longer than your waist (or longer if you want to tuck the end back into one of the loops). For the pink belt I used single crochet throughout, and for the turquoise belt I did a row of single crochet alternating with rows of double crochet. And of course you can do fancier stitches if you're more experienced.

3. Taper off a bit to make the curved end part. I just decreased by one single crochet stitch on either side. More specifically, skip the first stitch, and do the last stitch as a slip stitch not single crochet. If you skip the last stitch altogether you will get a bumpy decrease. (Maybe more experienced crocheters know a better way, so you can do whatever you like. You could even leave it straight at the end, but I find the corners start to curl.)

4. You can buy d-rings for the belt at most sewing stores. You sew both rings to the starting end of your belt by looping a small part of the belt through the rings over the straight part and sewing it down with a leftover bit of the yarn.

5. For the lining, cut a strip of fabric a bit wider than the belt, fold under both sides, pin and sew it onto the belt.

p.s. if anyone is wondering if people ever make my patterns (I was) have a look at this!
p.p.s. I've posted some fabric for swapping on Flickr.

Read more...

Guest Spot - Sarah H.'s knitting bag

>> Thursday, January 26, 2006

I just hosted our fourth stitch n' bitch last night, which is called Knizzles. So today I am showing off Sarah's beautiful knitting bag which is now finished. Her grandmother gave her the great wooden handles for the bag which is knitted using a bowtie stitch from teal coloured cotton. Here is a detail of the bowtie stitch:
In other news I had a lovely package today from Claudia in Austria. She had asked to swap for the children's embroidery book I posted here, and uploaded pictures of things she had to swap on Flickr. I chose a few things and she sent me this wonderful package! (includes the flower fairy fabric in the background). The big surprise is the handmade green pouch which she crocheted herself, it's so cute in variegated greens. I feel bad now because the book was going to cost $25 to airmail so I sent it surface... and hers arrived so fast! I will have to send her something extra to make up. Also, I actually used some of the pink floral fabric Claudia sent to finish my project from last night's Knizzles. I decided to crochet a belt last night because I wanted to make something easy that didn't take much concentration. Partly because I was hosting, but mainly because of all the fun and interesting chatting going on. I used a nice variegated pink/purple ball of yarn that was a present from Bradley (he's such a catch). As you may know a crochet belt can really stretch out and become much too long, so the pink floral cotton was perfect to make a fabric lining:It didn't occur to me that after going through the d-rings the lining would show, but at least it's a cute lining so maybe that's not such a bad thing!Next time I will showcase a creation by another Sarah in the group, an adorable Kate!

Read more...

Illustration Friday - cats

>> Wednesday, January 25, 2006

This is the first in a series of three paintings I am doing for one of the first illustration clients I ever had. She has a small publishing company called Stargazer Press that she started up herself. These three paintings will be birthday presents for her three children.

I was also asked about how I work, so I'll describe it now. First of all I do a sketch, and then scan it and send to the client for approval (if there is one). Even when it's commissioned for a personal gift (ie. not from a publisher) I still send a sketch to make sure the person is going to be happy with the picture. Once I'm happy with the sketch I transfer it to a watercolour block using graphite paper. I trace the sketch on top of the graphite paper (with a fine tip ball point pen) and the lines are transferred to the watercolour paper but can be erased later on.

After I've transferred the sketch I ink it using a waterproof pen. I use uni-ball vision micro pens, they're affordable (I go through a lot of them) and waterproof, and they're quite smooth with a suitable thickness of line for my artwork. Then I wait for the ink to dry, an hour or so is safe. Then I erase the graphite lines and I'm ready to paint.

The paper I like to use is the Aquarelle Arches Hot Pressed Watercolor Block. The Block has the paper glued all the way around so you don't need to pre-stretch your paper, and it keeps it from warping and buckling which can happen once you start applying watercolour. Also if you tape your paper to a desk you can't move it around, so I like being able to angle the block a bit as I paint. I prefer Hot Pressed to Cold Pressed, because I like the smooth surface. It suits my style and allows for small details. (Cold press is the kind of watercolour paper that has a texture to it, and when you brush paint over it the bumps can create small white flecks where the paint hasn't made contact - an effect some artists like to have in their paintings.) Arches Watercolor blocks are a bit expensive, but when I have tons of art to do and a short deadline it's worth it.
I like using watercolour pans, it's what I'm used to, and I don't really like fiddling with the tubes. I do use tubes to refill the pans though. It's a more affordable way to buy paint, plus it can be better quality. This is my paintbox, it has a fold out tray for mixing, and I made a painted template because sometimes paint dries very dark and it's difficult to tell what the colour is. So that's it! That's how I work these days, but like most artists I've developed tricks as I go along so I always pay attention when I read about how others work.

Read more...

Crocheted Girl in green outfit with hood

>> Monday, January 23, 2006

It turns out they're not all long gone! Someone named Ivy left me a comment for my previous post, saying she had the same little crocheted dog, and also remembered little girls in outfits with hoods. So here she is, I bought her at the same time as the animals.
It was hard to take her picture because she kept toppling over, but as you can see she has the loop at the top and is meant to hang as an ornament. The fabric she's sitting on was a Goodwill find, and I'm thinking of lining the green acorn bag with it, if there's enough.

Read more...

Amigurumi?

>> Sunday, January 22, 2006

It's the last day of my deadline, and I'm really tired! In the meantime here are some vintage amigurumi-type animals. I googled it, but I can't seem to find out what these used to be called, other than crocheted animals, but they seem to be the same thing as the Japanese amigurumi animals that are so popular these days. I bought these at an antique store, and the owner told me that they used to be given away as prizes at the Canadian National Exhibition. The little dog has wire in his legs.

I was so amazed at all the little details, and I love the little brown animal partly because I can't even figure out what he is, he's just plain cute is all.


p.s. thanks for all the nice comments about my pink rabbit! The needle book in the picture was actually in my very first post ever, and the namesake for my blog.

Read more...

Pink rabbit

>> Friday, January 20, 2006

I'll warn you right now, this post is going to be very very cute and it might be too much for some people who don't care for small pink rabbits who are big hams and love getting their picture taken.

My deadline was today, but since it's Saturday in South Korea (where the book publisher is) the editor has confirmed that the real deadline could actually be Saturday night so they get everything first thing Monday. (I'm going to post tomorrow about my art technique, thanks for asking, A Little Hut!) This gives me a bit of a breather, and I could finally make this rabbit, which I've been dying to make ever since I found the pattern and chose my fabric for it.

Here is the side view, he has a felted light pink ball for a tail. I used a scrap of yarn for the felted ball, it was a soft fuzzy wool yarn, easily loosened apart so it was similar to roving. Then I wound it into a ball as you would yarn, and rolled it in my palms with hot water and soap. (I haven't tried this before, and I was amazed at how easy it was. I've heard about making felt balls with felting needles, but I think doing it by hand is probably much easier!)

Here is a nice close-up - I was so pleased when I found out my camera can do a shallow depth of field, as it's called in the photography world. This means his face is in focus, but the background is nice and blurry. The background incidentally is a pink floral fabric I just bought on ebay.
Here he is wearing my thimble as a hat so you can see how small he is. I just realized today that it's probably easier making large softies, he was a bit finicky to make. But now I know how and he's lovely so there you go.
Here he is posing with my needle book...And here he is conked out on top of the needle book. I think he's going to fit in just fine with my other animals that spend most of the day sleeping. Except for Peter who is already looking resentful.

Read more...

E is for example

>> Thursday, January 19, 2006

This week I was asked by a book publisher to provide further samples as part of an application to illustrate one of their picture books. They've narrowed down the candidates, but are still working on making their final decision. Usually I would just send some of my existing samples, especially as it's always possible I won't getting chosen in the end. But this time I decided to combine my application with Illustration Friday and provide them with a sample illustration specific to the manuscript they emailed. I figure I can always use new samples to update my online portfolios (www.childrensillustrators.com/clairelmilne and www.portfolio.com/claire).

Rather than worrying about what they would be looking for style-wise I decided to approach it the same way I would Illustration Friday and just do it the way I would like to! So here it is, E is for Example, or even more specifically, E is for Escape since the puppy has escaped and shown up at a neighbour's door.

Read more...

Brown mittens sold-and my 1st craft supplies swap

>> Monday, January 16, 2006

I sold my first pair of mittens today! They went to a friend at my old job. She tried on the purple and pink mittens and liked the feel of them, but wanted a more earthy colour and no embroidery. I suggested the brown and in the end she was very happy with the mittens. I felted them just a little bit, so they're a bit denser which will make them warmer. It was kind of in between just blocking and actually felting them and it turned out really well. I also used a detail from my recent The Owl and the Pussycat illustration for the tag when I wrapped it.

In other craft news, I received my first crafts swap from Teresa in Portugal. She was interested in the merino wool I had to swap so she'd be inspired to try knitting. I hope it worked! This is the cute package she sent in exchange:

If you look in the top photo there's a candy on top of the card. I'm embarrassed to admit there were a lot more of those earlier today but I ate them before I got around to taking the picture. They were delicious! I like citrus anything, candy, cake, tarts, soap, graphic motif, anything. So thank you Teresa for the lovely package. I already have plans for the flower fabric, so I'll post that project soon.

Read more...

Receipt of my first ATC

Ok, now I'm a little insecure again about my ATCs because how beautiful is this? I just received my first ATC from Mimi and I was so delighted. Her cards are even more beautiful in person. I saw the pictures at Flickr, and I marked the top one as a favourite. Mimi saw this, and offered to swap, thereby introducing me to the wonderful world of ATCs.

Each card has a handmade envelope from special paper, sealed with an animal sticker. Mimi also sent me a postcard with a vintage graphic - on the back it says The Bird (from La Loteria) Mexico c.1930. Interestingly it's another caged bird...I love it. I don't know why but I just like so many old-fashioned/vintage things. Maybe back then things weren't so rushed all the time and people had the time to put more care into the things they made? Here are some details of the cards:Thank you so much Mimi!

Just in case you're wondering, I photographed these on top of a great vintage Japanese robe I found at the Antiques at the St. Lawrence store. I was inspired by little bird's posting "party day". I had wanted a pink kimono for years, and that posting reminded me about it. Antiques at the St. Lawrence is the little antique/vintage store at the south-west corner of the St. Lawrence market (North building) in Toronto. On Saturday the north building has a farmer's market which is so great for fresh produce, cheese, raw honey, baking and jam, and on Sunday it has the flea market which I adore. Now I just have to make a gorgeous obi to go with the robe!

Read more...

Blue doll quilt

>> Sunday, January 15, 2006

I made this blue doll quilt last week, after years of meaning to do it, it's a small quilt for Hatty made from some vintage fabric. I had the squares cut and squirreled away somewhere, and remembered about my plans to make the quilt after seeing Hillary's beautiful quilts for her dolls. I was actually very busy with an illustration deadline and yet I found myself fixated on finishing this quilt. I was sewing until late in the evening, and kind of determined to finish it lest it never get done. Then I suddenly realized that it was an odd thing to be doing, making a doll quilt isn't exactly a necessary thing to do, doesn't really need to be a priority or rush, I don't even have children! I wasn't even that crazy about it when it was finished. (I think I may add some stitching for more texture? Plus this is my first machine quilt, the only one I've ever made before was done all by hand and it was much neater).

Then I realized this isn't a stupid thing at all, it's about making things for the pure joy of it. Lately I've had so many creative ideas it's been hard to be practical and get my work done first. So I find that the reason I'm really loving making my ATCs is that they're not necessary at all, just a small beautiful thing, to share with other people, a way of sending out little messages into the world. Sorry if I'm starting to sound too sentimental, I just read Blair's kind words at wise craft and I'm feeling very happy to have found others who also love beautiful things for their own sake!

Read more...

Corners of my home - front hallway

>> Saturday, January 14, 2006

My front hallway with the basket where I keep all my hats, scarves and mittens. Also my bags including a beautiful bag I bought at a store I discovered near St. Lawrence market recently. It's called Pink Poppy and like Propaganda it's full of handmade goodies from local artists and crafters. Inside is Jeero, who is in charge of my keys and is always vigilant, prepared to open the door at any moment. He is next to the green scarf made for me by Bradley from the skein of yarn he learned to knit with (Bradley not Jeero).

Read more...

Corners of my home - the library

>> Friday, January 13, 2006


Another blog I've been enjoying lately is tree fall design and I've added it to my blog list. I found it through a comment left on needle book, then forgot to bookmark it and couldn't find it again. I did some googling but couldn't come up with the name. Luckily Manda at tree fall design left me some new comments and I found her blog again, and there were lots of lovely new posts.

Lots of people are really enjoying Amanda's "corners of my home" idea, and in fact I was just talking about this very thing with a girlfriend a couple of days ago over coffee. I go to blogs because they inspire me with beautiful arts & crafts, illustration and design, but I also love the sneak peeks into the little everyday things, handmade cushions on couches, a knitted toy sitting in the snow, cluttered crafting corners. So the picture above is my contribution, a set of bookshelves which I like to call the library, despite the fact that they hold less than 25% of my many many books.
First bookshelf:
On top: a reproduction vintage robot I bought for Bradley, a green piece of a wooden train set made by my dad as a baby toy, an old "baby ben" clock, a wooden russian doll and picture frames. Inside: Edward Eager's magic story books, A Room with a View, the Mary Poppins series, Jane Austen, Charlotte Bronte, Frances Hodgson Burnett, Daniel M. Pinkwater and Roald Dahl books, my Kate Greenaway birthday book, Curious George money box, miniature book collection, mini robot clock, Little House on the Prairie box set, miscellaneous literature such as Tolstoy and Thomas Hardy.

Second bookshelf:
On top: wool llama, hat box, antique sewing box from great aunt given to me as a child (which I finally stopped using because it was literally falling apart). Inside: more literature, Douglas Adams books, vintage box lined with green silk, with embroidery threads in it, Peanuts book collection, my beloved Finn Family Moomintroll books.

These wonderful shelves were custom made with wood from my old futon bedframe by my good friend Ben, who is currently in Japan working on his materials engineering research and (hopefully) buying me Japanese crafts books.

Read more...

Vintage handkerchiefs

I discovered some new blogs that I like last night, and added them to my favourite blogs at the side. I decided to add stars to recent ones, so people can see the new ones and try them out! And while you're at it, visit one of my favourites for some time now, wise craft.

Both dioramarama and plump pudding mentioned vintage handkerchiefs, which inspired me to post some of mine. I'm not a collector, but I find when I go to flea markets I can't seem to resist them. Dioramarama posted about a book she had received called Handkerchiefs: A Collector's Guide. This got me thinking about the handkerchief set from my childhood that really haunts me. Yes, I did carry around handkerchiefs as a child. Not because I grew up in the 40s, but because our family still had some old-fashioned British traditions going on in the 70s and 80s, things I still really love, such as afternoon tea, hot water bottles and handkerchiefs. Anyway back to my favourite set, now long gone, it was white and each handkerchief was embroidered with a day of the week and a little animal in the corner. The animal was some kind of small anthropomorphized figure, and in some cases it wasn't exactly clear what kind of animal it was, but they were really charming. I've looked, but I have never been able to find them. The closest is the Sunday one in the middle. Here is a detail:

I love it, but it's just not the same as my animal set, so if you ever find the animal days of the week, and want to swap for them, or sell them to me, please email me!

Read more...

My ATCs

>> Wednesday, January 11, 2006

I've made my Artist Trading Cards at last. I worried quite a bit about this, I had a lot of ideas about making them, but I admit I was a bit daunted by the beautiful handmade cards I was seeing. But everyone has to do things in their own way and I think my many years in book publishing has resulted in my own children's illustrator version of ATCs. Which I hope will appeal to my swappees! (possibly not a word)

My ATC cards are a series of cards in an envelope made of paper which I marbled myself. The cards are printed with details from recent illustrations of mine. The illustrations I've chosen are special because they were all done for Illustration Friday, which means they weren't done for pay, for a client or to be published elsewhere. Illustration Friday has been really good for me, it's given me a chance to further develop my personal style without any of the contraints of working for a paying client, and this freedom has reminded me of why I love drawing and painting.

Speaking of paying clients, I am currently swamped with work for my current book which has a very tight deadline, so I apologise if I've been slow to reply to emails. As always, thank you for visiting and for your comments which are most welcome!

Read more...

  © Blogger template Simple n' Sweet by Ourblogtemplates.com 2009

Back to TOP