Crafty afternoon

>> Sunday, May 28, 2006

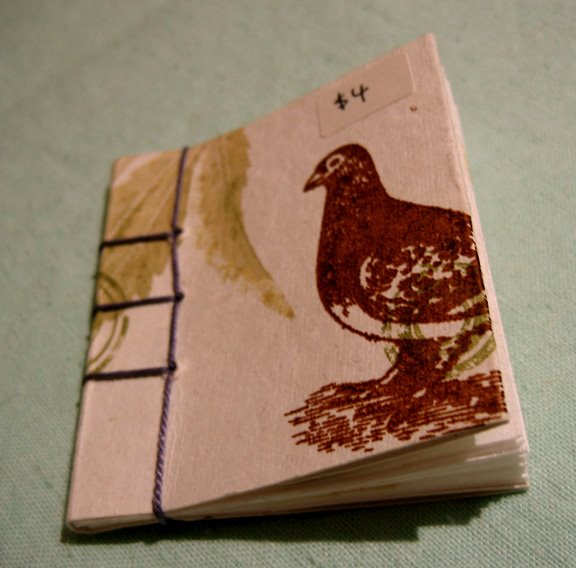
Today was a very busy craft shopping day. First of all two girlfriends and I went to the craft materials sale at the Textile Museum. Afterwards we took the Queen streetcar over to the Beaches, and visited Crafternoon Tea. The picture above is my favourite item I bought at Crafternoon Tea - a lovely little notebook by le petit pig. There was also a book binding worshop which I did and made a little notebook myself. I'm going to decorate the cover and maybe show that later.

In the meantime this is the back of the notebook, I love the beautiful bird prints on the cover. And even the pages inside are printed, with the label in the front and also you can see how small it is from my hand. There were even tinier ones for sale, but I really loved the bird decoration on this one. 
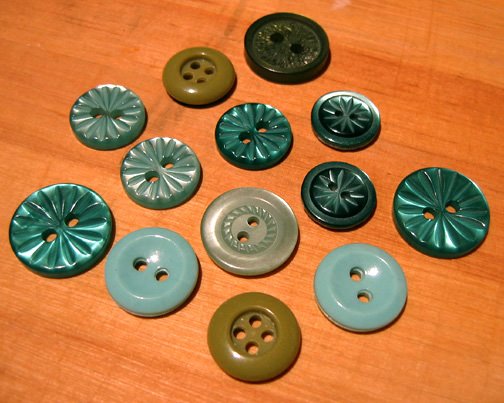
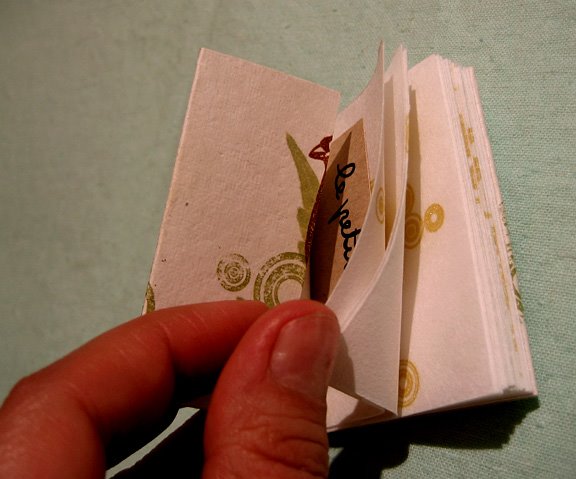
But before Crafternoon Tea, there was the textile sale. I bought a big bag of fabric (despite plans to do no such thing). I had decided not to go nuts buying crafts supplies since I already have so much, but rather I had resolved to just look and maybe get a couple of things that I really really liked. But as you can see, they had so much good stuff at really low prices, most of the fabric pieces were $3 for large pieces, or $2 or less for smaller pieces. I'll be showing these in more detail once I start making things with them.
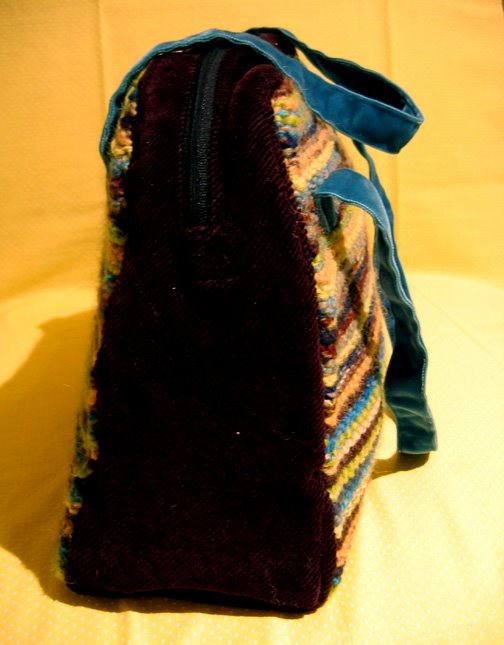
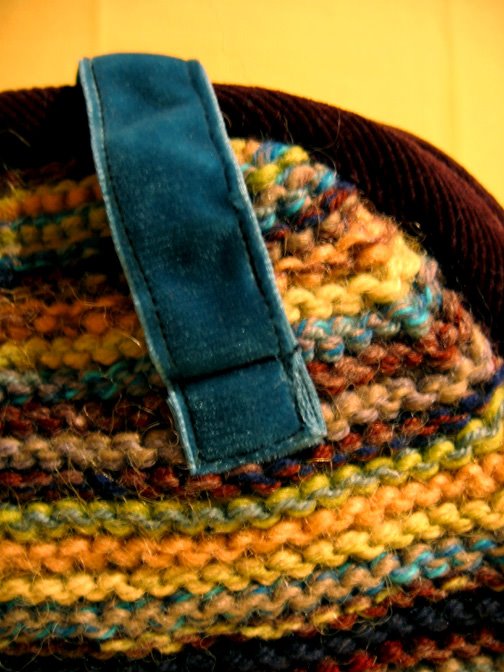
Here is one of my favourites though:
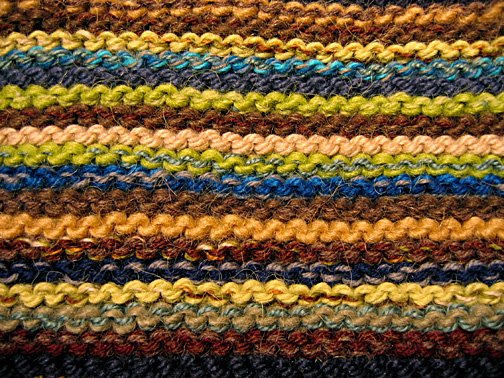
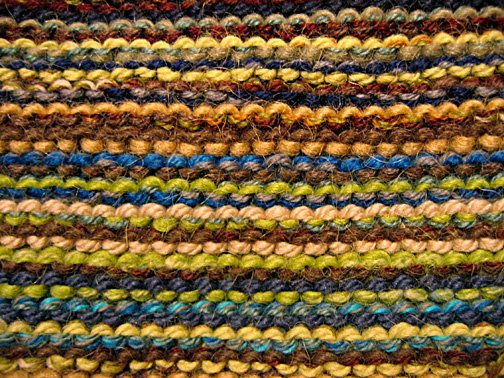
I also stocked up on wool for crewel embroidery - the largest bags were $3. So hard to resist! Plus I really do use it...
But back to Crafternoon Tea... they also had a hand spinning demonstration. I tried it out and found it actually quite tricky. I still don't really know how to do it - you can see my pathetic efforts on the spindle below. This was the kit I bought there for $10 - it included the spindle, instructions, my leftover bit of wool from the class (which was free) and a lovely big piece of blue/green roving. I will spin it someday! I found a great site that has little movies to show you how it works.
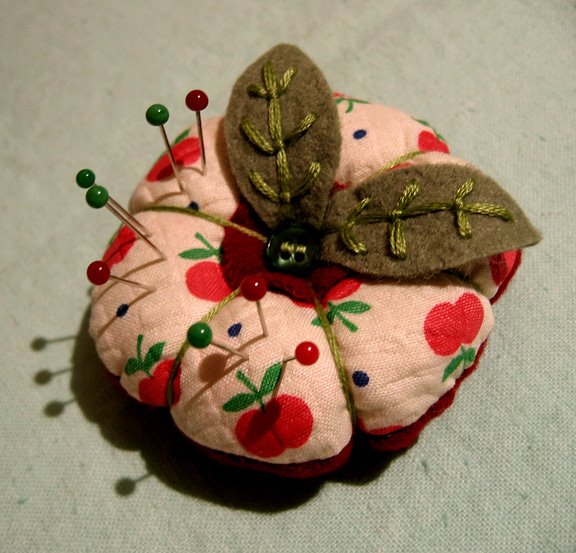
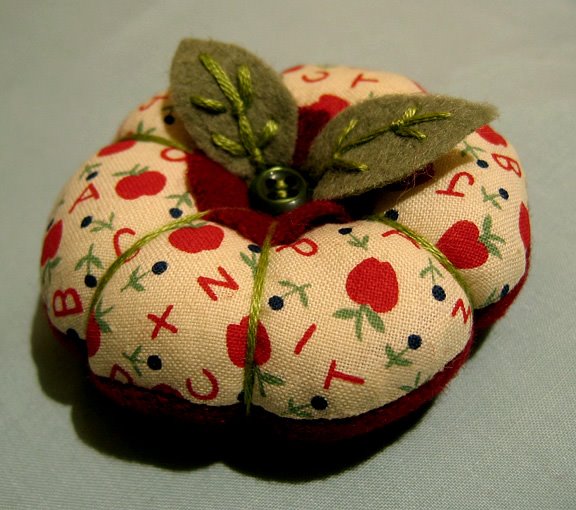
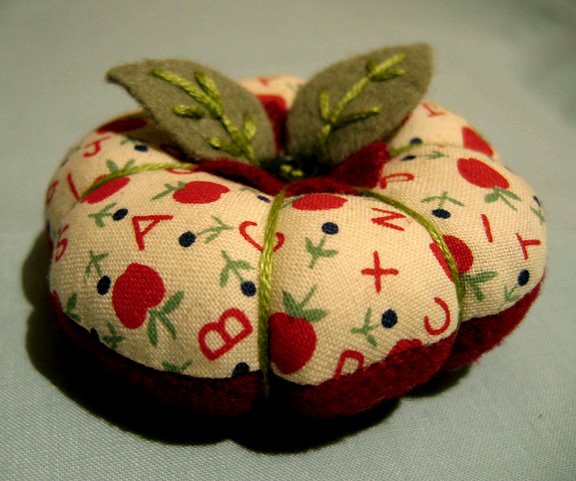
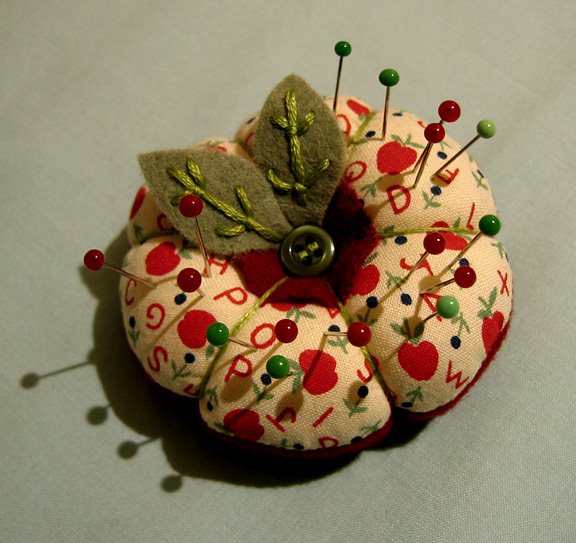
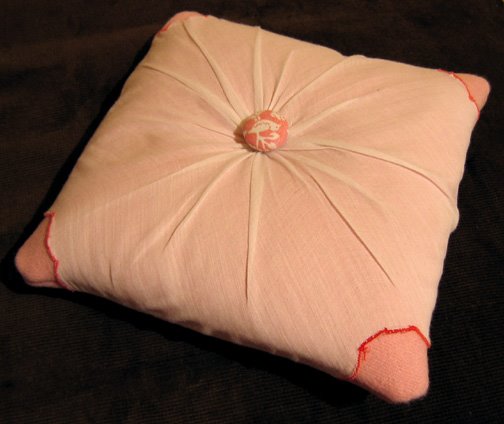
And finally just to justify all these purchases, I actually made something already, another apple themed pincushion. The first one I made got scooped up in my etsy shop, and I had some comments from people who had wanted one too. I really don't have any more of the other apple fabric, but this one is similar and quite cute - it's a cotton seersucker with apples and blue dots. My girlfriend Sarah found it first but let me have it!

Read more...

Apple letter pincushion

>> Friday, May 26, 2006

This is my first pincushion for the pincushion challenge. The theme for May is fruit, I found out just in time to join in. I just found out about this new blog thanks to Rose at Crafty McGee. She made a whole bowl of pincushion fruit and now she can sort her needles by type of fruit - such a cute idea.

I kept mine quite simple, inspired by a little square of reproduction vintage fabric from my birthday stash which had apples and letters on it. It was just enough to make two little pincushions, both the same, one I'm keeping and I'll put the other one in my etsy shop. I think this is my favourite of all my pincushions I've made so far. I don't know why, it's quite simple, but I just love the apple fabric. It's firmly stuffed and smallish at 2.5" in diameter.

The back is red wool felt, here's a view of it: The leaves and the red circle on the top are made from wool felt too - meant to represent an apple viewed from the top. Then I embroidered the leaves with embroidery floss and added a tiny green button on top and another slightly bigger one on the bottom.
Oh and while I'm being obsessive, here is my beautiful new pincushion with pins!Sometimes in my comments someone asks a question but without their email linked to the comment so I can't reply directly. In those cases I just reply in the comments or mention the answer in my next post. I hope that's ok! I do appreciate all my comments, and I often use the links to hop back over and see your blogs too. Although I must admit I am quite behind these days on all my blog visits.

One question was about which scissors I use to cut the scallops on my felt decorations. I actually do it myself with regular scissors. I cut little "v"s evenly spaced around the circle, then curve the edges. It's a bit fiddly but not that difficult. In case you're wondering what I'm talking about, this particular pincushion doesn't have any scalloped edges, but my other ones do on the top where they're decorated with felt flowers.

Read more...

Peachy iPod cosy

>> Thursday, May 25, 2006

This was the iPod cosy I made for my girlfriend's birthday present. It's made from a blend of peachy watercolour mohair and pink merino wool in garter stitch. This cosy was lined with dark brown cordoruy with a matching strap. There is a felt flower and button decoration on the front.This is a picture of it from one end - as you can see it fits an ipod snugly, but it would also be good for a cell phone. The strap works well because it keeps the contents in place, but it's easy to get the phone or ipod out by just pushing it to one side - no fiddly snap or button closures. It was fun to make so I've made another one and put it in my etsy shop. The lining on this one is vintage floral fabric:If you'd rather make your own it's really just a knitted square folded in half and stitched together, with the fabric lining sewn in. So next time you give your iPod a knock it will be just fine!

Read more...

Working on Puss in boots

I've been busy lately with illustration - too busy to post much! I was doing so much knitting I got a little bit behind with my work. Right now I'm working on the illustrations for the fairytale Puss in Boots along with a few other projects. The picture above is a detail from the illustration where Puss presents a rabbit to the king on behalf of his master, who is actually the poor miller's son. After this I'll be working on Cinderella.

Illustrating fairytales was what I hoped I could do someday if I ever became a children's illustrator. But so far there's been a lot more work for me in educational books, illustrating everyday life fairly realistically. Trade books are often more imaginative, and the style can be a little bit more expressive. The current books I'm working on are quite simple and quick projects but for longer-term trade book projects the style can be more elaborate and/or more stylized and can become really beautiful art. One of my favourite contemporary picture book artists is from Japan, his name is Arai Ryoji and I discovered him because one of his picture books won the Astrid Lindgren Memorial award.

Bradley found several Arai Ryoji picture books for me on the Japanese Amazon site. On a bus last night we heard a little girl explain to her father that several means 20. But in this case I should clarify that it means ten. If you google him you will find samples and I recommend it because he is just really really brilliant! Every time I look at his artwork I'm inspired.

Read more...

Whiplash topic: colour - Part 2
Blue-brown-green knit bag

>> Monday, May 22, 2006

Ahh! Now this one I am very happy with. The front and back are the knitted pieces I showed in my last post - I even matched the stripes so they are almost identical. The sides, top and bottom are made up of dark brown cordoruy, with a zipper sewn in (that was the hardest part). The sides/top/bottom are lined, but the front and back aren't so you can see the back of the knitting when you look inside the bag. I didn't want to cover it up because I like how the back looks too.

This bag is definitely all about the colour too, I love how the greens and blues pop next to the dark brown. I showed closeups of the knitting in my last post. The other nice thing is that it's definitely a "use what you have" project. I used up lots of bits of yarn, a zipper I had lying around and the cordoruy is from a skirt I bought that I never really liked.

Here's another view of the side.
The handles are made from velveteen (?) ribbon sewn together so both sides are fuzzy. I just happened to have some in this turquoise colour which I think looks really great with all the other colours. Here's a detail:
And finally, I had quite a bit of yarn leftover so I made a matching cell phone cosy. This is my best one yet, it's lined with the corduroy which has a little stretch in it, so it's very snug and I have already knocked it onto the floor and it was fine!
While I work on crafts projects I like to have a movie going in the background. Or vice versa - when I'm watching movies I like to have a knitting project on the go. It think it prevents me from feeling guilty about watching t.v. And often I develop an association with the item I'm making and the movie I was watching. In this case it started with the original Planet of the Apes, which I'd never actually seen before, and finished with the new Hitchhiker's Guide to the Galaxy. Now all I have to do is pack a towel in there and get going.

Read more...

Whiplash topic: colour - Part 1

>> Saturday, May 20, 2006

These are the blues and greens and browns that I've gathered up to make the final Whiplash project. It's all leftover yarns and they are all wool of various kinds. I decided to do a garter stitch (all knit) bag with them so that the colour is definitely the main feature. Each two rows I'm switching colours, and I'm blending yarns together so that it's always a chunky weight, and to create variations in colour.

Working on this has kind of been an exercise in colour theory - because how you blend colours changes how they look, as does which ones you juxtapose. This project reminds me of how difficult it turned out to mix my own yarn. In general mixing colours is also a great way to use up yarn and create more, if you have an orange that is too bright, and another that is a bit dark or drab, blending them can make a great rusty orange colour. And of course it works with textures too, a smooth fat yarn can blend with a fine mohair to create a yarn with substance and a little bit of soft fuzziness.I also used a small needle size given the thickness of the yarn, so it's created a nice thick and dense piece of knitting. Perfect for a bag. The shape is going to be something a little different for me too, similar actually to Ingrid's handbag.

What I'm trying to work out as I go is which side is the right side. On one side there are thin two-row stripes of colours, with some mixed colours due to combining yarns.
But the reverse side is even more mixed up and I like the way that looks too:
Well I'll have to decide soon...

Read more...

Clapotis?

>> Friday, May 19, 2006

I finally tried the Clapotis pattern from knitty.com. I guess I liked the picture and the description sounded really great - I was caught up in that whole Je suis belle et ça ne demande aucun effort thing. And I had two skeins of red and pink Cascade Quatro that I thought would be perfect. I like yarn with different strands of colours, but I don't always know what to make with it. Although this is the kind of pattern that will show off multi-coloured yarn I'm just not that into the pattern anymore...I think now that I've tried it I would like it better in something much finer and softer like a kid mohair.

Now that I've worked it out, I thought I could at least offer some tips to others trying it. The pattern looks complicated but if you take your time and just trust the pattern it's not that difficult. But I did work out a little trick that may help with the 2nd section which can be tricky. As you know if you've tried this pattern it can be hard to unravel mistakes and figure out where you are. So this helps with that. Because if you forget just one k2tog or yo it can be hard to fix. My idea was that the 6-stitch repeats are always the same, so you really just need to keep track of the number of stitches before the first and after the last marker. With the chart you can at least figure out which row you're on just by counting the stitches before the first and after the last marker. And you know right away if you've made a mistake.

Here's the chart I worked out.
Row Beginning (before 1st marker) End (after last marker)
Purl row 1 6 stitches 5 stitches (becomes 4)
Knit row 2 4 stitches 6 stitches (becomes 7)
Purl row 3 7 stitches 4 stitches (becomes 3)
Knit row 4 3 stitches 7 stitches (becomes 8)
Purl row 5 8 stitches 3 stitches (becomes 2)
Knit row 6 2 stitches 8 stitches (becomes 3)
Purl row 7 3 stitches 2 stitches (becomes 1)
Knit row 8 1 stitches 3 stitches (becomes 4)
Purl row 9 4 stitches 7 stitches (becomes 6)
Knit row 10 6 stitches 4 stitches (becomes 5)
Purl row 11 5 stitches 6 stitches (becomes 5)
Knit row 12 5 stitches 5 stitches (becomes 6)

Here's a close up of mine - I did fewer repeats to make mine smaller since I only had two 100-gram skeins. I pinned the scarf down for the picture because of course it curls up a lot and would need to be blocked.
Here it is even closer - I think I'm going to unravel it now - I just don't like it that much. I think it's a great pattern but the yarn is a bit thick and not very soft. At least I finally know what everyone is talking about!

Read more...

Bags, bags more bags

>> Wednesday, May 17, 2006

Thank you so much to everyone for all the nice comments on my Whiplash project. Deciding to do it was great because I was having a drab day and I got really inspired when I put together all my materials to make the bag. I know it's been done a lot before, but I am just so not tired of the pale blue and dark chocolate brown colour scheme. Plus the floral curtain fabric was a recent find that I really loved.

When I initially read about the Whiplash competitions I didn't notice that it was only for six weeks - otherwise I would have joined in sooner. And how great are those prizes?? My favourites are the Holiday Knits book (Chronical press has such beautiful books) and the One skein book.

The other idea I had for the yarn theme was to try granny squares for the first time. I'm quite good at crochet now, but I haven't actually tried the multi-coloured granny squares that are so common, and I thought it would be a great way to use leftover bits of yarn. I even gathered up a big bag of blues and greens to work with. I think I'll still do that next. I saw a girl at the market a few weeks ago with a yarn granny square bag, and it was made with dark brown and mossy greens and it looked so cool and pretty. When it comes to the lining, I think I'll use the green floral in the background of these pictures. These lovely fabrics were another birthday present from Bradley that showed up a couple of weeks after my birthday. Speaking of bags, I found the straw bag at the top of this post today while having a quick thrift shop. I wondered if it was too kitschy but still thought it was pretty and couldn't resist it.

But what I'm most excited about right now is the Amy Butler Weekender Bag. I saw a few versions of it on the sewiknit site. I love this one. And how gorgeous is this one? I've read a few descriptions and it sounds pretty challenging. Does anyone have the Amy Butler pattern that would like to swap with me? I could make a custom needlebook/pincushion etc. in exchange for the pattern. I thought maybe someone might have already made the bag and like to swap the pattern now that they're done with it.

Alternatively you could keep the pattern to yourself and support my attempts to do something in life other than make bags...just kidding!

Read more...

Chickadee blue and brown knitted bag
Whiplash topic: Yarn

>> Monday, May 15, 2006

It started out so well... I decided to try out the Whiplash competition and create something for the topic "yarn" over the weekend. I had the best materials - light blue wool yarn, brown wool, a dark brown fabric with white floral pattern and wool for crewel embroidery. I even realized I could finally use the big round wooden button I had lying around and a bit of the brown grosgrain stitch ribbon. Of course I knew I didn't want to just make something with yarn, but really be inspired by yarn and use it to knit and embroider and felt.

I started by knitting up the two squares making them as big as I could while using all of the 100 grams I had in each colour. I had to unravel halfway through to change the proportions. But that was the easy part. I washed the squares in hot water to felt a tiny bit and then blocked them so they wouldn't curl up so much.
After that I started the embroidery - my inspiration was a chickadee I had seen on a shirt at Goodwill. The shirt was a big baggy ugly sweatshirt so I didn't want it, but I loved the colours in the bird illustration. I tend to "draw" the design with a neutral colour, then fill in the colours using satin stitch and chain stitch for the wing in this case. I love the finished bird embroidery on a berry branch!
The embroidery and the colour scheme were the best part, but things went down hill a bit when it came to assembling everything. I originally tried to make the strap with just the floral fabric but it looked floppy and awkward, plus I wasn't sure how to put in the lining and if that would be enough to keep the knitted sides in place. I undid all this and went to bed. That was Sunday night and the rules say to submit the project by Monday!I revised the construction, by adding interfacing on the lining, then stitching it to the new strap/sides/bottom (which was one big loop). I used cordoruy for the strap with floral lining. The inside also has a pocket and was handstitched to the sides before adding the knitted layers. Please note that I was even reduced to basting!!! Something I am usually never patient enough to do.
Then I handstitched the knitting on and added a ribbon loop for the clasp, with the brown wooden button. This is the finished bag - it's quite large, 10.5" x 16".
Here's a close-up picture of the lining. The fabric is from a thrifted curtain, which I unhemmed, washed and (eek!) ironed.
And of the brown wooden ball button:
In the end I'm a little bit disappointed - it didn't quite turn out the way I imagined it would. I do love the embroidery though. So I'm going to add the link to Whip up now and go to bed!!

Read more...

Moss green banjo scarf

>> Friday, May 12, 2006

This is another recent scarf I made. It's a long (70 inch) skinny (2.5 inch) scarf from two skeins of elsebeth lavold Angora, which is 60% Angora, 20% Wool and 20% Polyamide. It's a rich mossy green.I used a cable pattern called banjo stitch that I found in one of my knitting books. I added a two stitch rib on each side and an inch of k1 p1 ribbing on each end, then I blocked it to flatten it out. I've also finished my lace rabbit tracks scarf now, so I'm thinking of putting the banjo scarf into my etsy shop. Here's a detail of the banjo cable stitch. It's a bit complicated, this one is a 16-row repeat.Lovely for cool Spring evenings!

Read more...

Rabbit tracks lace scarf

>> Tuesday, May 09, 2006

As promised, here is the angora scarf I've been working on from a single 25 gram skein of "Angorissima diamond" 100% pure Angora yarn. The yarn calls for size 6 needles, but I'm using size 8 so that it will be soft and loose and not curl. It won't be as long as the pattern suggests, but long enough, and it's great to be able to make something nice with just one skein of yarn.

Here's a detail of the stitch. I think it's lovely. I was looking for a lace pattern that would be fairly simple - I just wasn't in the mood for a 16-row repeat. Also I wanted it to look lacy but have a clear pattern, not just overall cobwebby if you know what I mean. If you haven't tried lace knitting yet be assured that it really is quite easy. The only stitches you need to know for this pattern are ssk, yo and k2tog. There are only two real pattern rows because it's a 4-row repeat but every odd row is just purled.
So here is the link to the free Rabbit Tracks pattern - thank you Alison! I'm always very appreciative when people take the time to write out patterns and are willing to share them for free. As Alison mentions it's a variation of the feather and fan pattern. I had noticed that Craftapalooza has been working on a feather and fan lacy scarf recently, and I was looking for a similar pattern. The Rabbit Tracks pattern is easier, but has the same pretty effect. It does have a wrong side - it looks the same but with purl stitches - but I think it looks quite nice, so it's ok.

It is a bit late to be knitting a scarf, but it is quite light and airy looking so it works for spring. It can get still get quite chilly in the evenings, so I think it will be a good addition to my more wintery scarf collection.

Read more...

The ring pillow revised...
and yet more buttons

>> Sunday, May 07, 2006

This spring has been so lovely, all the blossoms are out on the trees and flowers everywhere. We went for a walk on Saturday and headed down to Queen West (through Queen's park where there was some kind of big pot festival?). First stop was Mokuba to find a ribbon for the ring pillow. See - I listen to you guys - and thank you everyone for the comments and suggestions.

In case you don't know, Mokuba is a large ribbon store with rows and rows of ribbons. It's clean and tidy and new, very white and spacious and a bit on the expensive side. But they have a wonderful selection and I knew I would find what I was looking for.

A page from Martha Stewart Weddings was the inspiration for the colours of our wedding. I love the brown ribbon in the picture. It's a grosgrain ribbon with tiny white stitching down the centre. So while looking for a ribbon for the ring pillow I thought it would be nice to bring in the brown, and preferably find this exact style of ribbon. Of course Mokuba had it, they even had the dark brown, but it seemed a bit too dark and almost eggplanty so we ended up choosing a lighter brown version. Here's a detail of the revised pillow:
I say revised, because for some reason in that posh ribbon store, the pillow suddenly started to seem a bit lame, not stuffed enough and the hanky seemed a bit saggy and the yarn was just an embarrassment. So I added some more stuffing and snugged up the hanky by gathering it more in the back. And then, believe it or not, I ironed the whole thing while assembled.
It's still not perfect, but I do think it looks better. The back especially is a little bit awkward looking, but acceptable mainly because it is the back.
So, I wasn't sure if I should bore you with the ring pillow yet again first, or another reference to Martha Stewart, or perhaps yet another button picture. I've decided to end with the buttons. Because I know what you're thinking, "what is with needle book and buttons?" Well in this case I'm not just showing them off, they do come with a recommendation - at least to local readers - because they're all from a store on Queen West called MacFab (www.macdonaldfaber.com) so you could get some like these too.

I went into MacFab for the first time to see what they have, expecting to find fancy designer fabrics as featured occasionally on Cityline (incidentally I looked up their site and found this pretty pillow sewing project). But in fact they had lots of sewing extras including stacks and stacks of boxes with buttons attached to the front so you can see what's in them. I don't think most people take 15 minutes to spend $3.22 on buttons, but that's what I did, and these are the lovely buttons I chose:While we were on Queen West we also exchanged one of Bradley's skeins of yarn from two years ago at Romni (you can exchange yarn even years later as long as you have the receipt) and he bought me a lovely skein of white 100% angora. I'm making a lace scarf from it which I will show you in my next post - along with the link to the free pattern.

Read more...

The $10 Thrift Challenge

>> Saturday, May 06, 2006

I went to my local Goodwill store yesterday, as I often do before going to work on my illustration in Starbucks. I usually do some working at home in the morning, mostly emailing and organizing, then I like to get out and work in a coffee shop - partly to get out of the house and partly to prevent myself from being distracted by the potential for crafts projects all around me.

So anyway, as I was walking along enjoying the beautiful spring weather we've been having (which we attribute to Bradley's recent purchase of a MEC Gortex rain jacket - I've never seen anyone so disappointed by no rain), I decided it would be fun to set a $10 limit and see what I could find with that budget. It's a good idea to set a limit in any case because it stops you from picking up things you don't really want/need. I have too good of an imagination so when I look at things I can think of all kinds of things to do with them. Ie. This skirt is too big/small, but I could use the fabric to sew a cute little tote.

The first thing I found was the beautiful tablecloth in the background of the picture. It's pale yellow with grey and white flowers in a border and in the middle. It was a lovely heavy soft fabric, and it was $2.99. I also found a pink pillowcase to use for fabric - that was $0.99.

After that I found this cool red-patterned handbag. Now I really don't need another handbag but the fabric was just so great. That was $2.99 as well. So the total came to $7.53. The back of the bag is black, and the inside is dark red with a pocket on one side. When the handles click they sound like knitting needles.
Later on I met up with Bradley and he wanted to go look at second-hand books, so I suggested we go back to Goodwill since I was at the coffee shop around the corner. That's when I found the Martha Stewart Kids I missed the first time around - that was $0.49. As I mentioned before they're no longer going to be putting out Kids so I want to collect them all. Incidentally they sent me a card to tell me that they were going to finish out my Kids subscription by substituting Everyday Food. At first I was disappointed but then I had a look through it in the supermarket and it's actually very nice. It's a small format magazine, which I like, and the photography is beautiful (as usual). No, I am not getting a kickback from Martha Stewart but I'm starting to feel like I should. Anyway, this brings me to a total of $8.02.

Now you might think that I should be done with the $10 Thrift Challenge, and I came in under budget, but I kind of wanted to get closer. So in the evening we went out to see a movie, Friends with Money (which was really good), and stopped off at BMV books on the way. There I found a Martha Stewart magazine for $1.99. They had a few, I picked one with an article about quilts. They charged me $2 no tax, so the grand total was $10.02. And that's my $10 thrift challenge. It was fun, so I recommend you try it yourself!

Read more...

  © Blogger template Simple n' Sweet by Ourblogtemplates.com 2009

Back to TOP