Vintage button bracelet

>> Monday, March 13, 2006

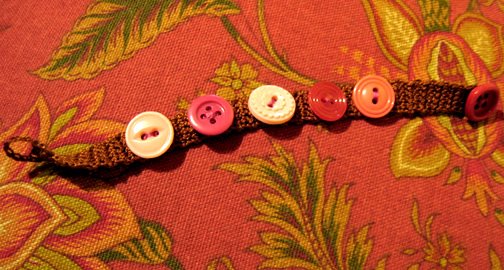
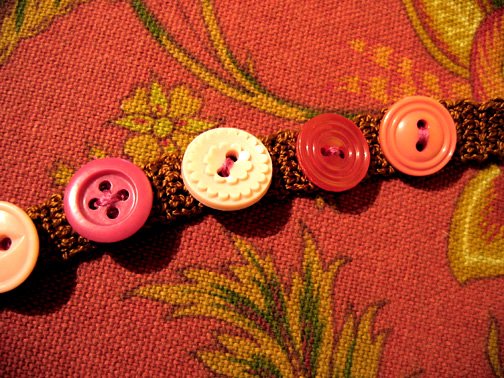
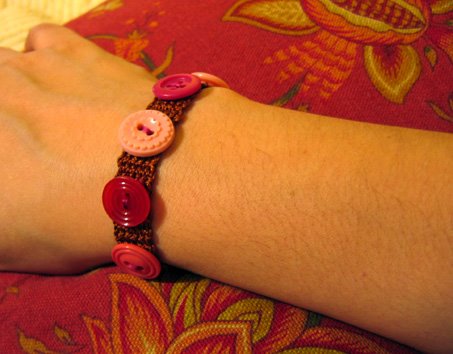
I loved the vintage buttons I bought recently in Montréal so much that I've been thinking of making a button bracelet. I got the idea from one that was in the store, it had really nice buttons on it, but it was made of metal links and I thought I would rather have the bracelet part made of a ribbon or something similar. So I crocheted a "ribbon" using brown pearl cotton (size 8), and a tiny 1.75 mm crochet hook. One end has a loop to go around a button for a clasp, and the rest of the buttons are sewn onto the top in the usual way.Once it's closed, the clasp button covers the gap:Here's a detail, these are some of my favourite buttons, in my favourite colours:It's a great way to enjoy your favourite buttons and have a one-of-a-kind bracelet!

Read more...

Current illustration projects

>> Sunday, March 12, 2006

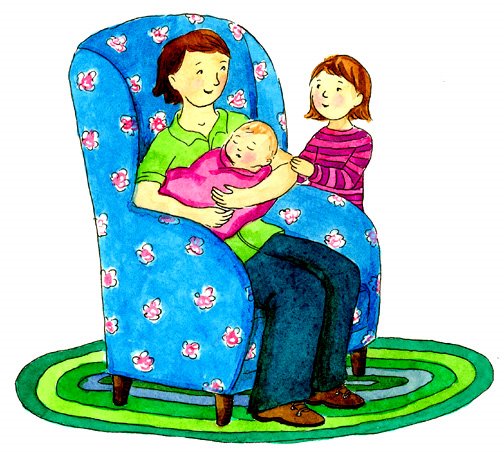
This is a current illustration project of mine, a picture book about a girl who is adjusting to a newborn little sister, it's called Drusilda's New Sister. This is a project for Stargazer Press. I'm also working on an illustration for a new children's mystery magazine that a publisher in the U.S. is starting up. And finally I have an upcoming project for a company in Indonesia, illustrating some classic children's stories such as Puss in Boots and Cinderella.

Lately I've also working on updating my portfolios because this week I received several copies of books I illustrated last year. All of these books were intended for schools, which means that they're not available in bookstores. But thank you to those who have asked about buying copies of my books! The kinds of children's books that sell in bookstores are called trade books - as opposed to educational books, and I am hoping to do more of those in the future.

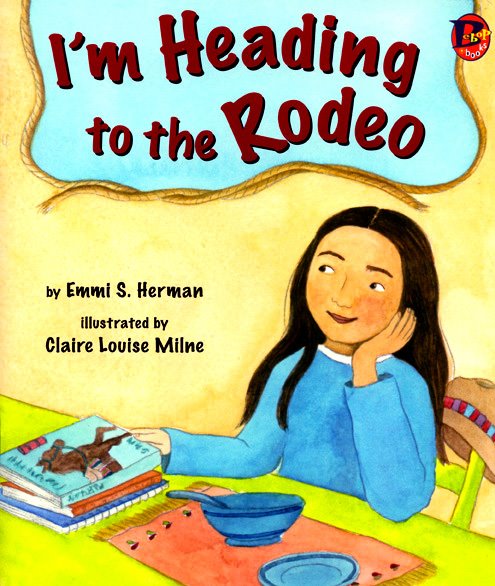
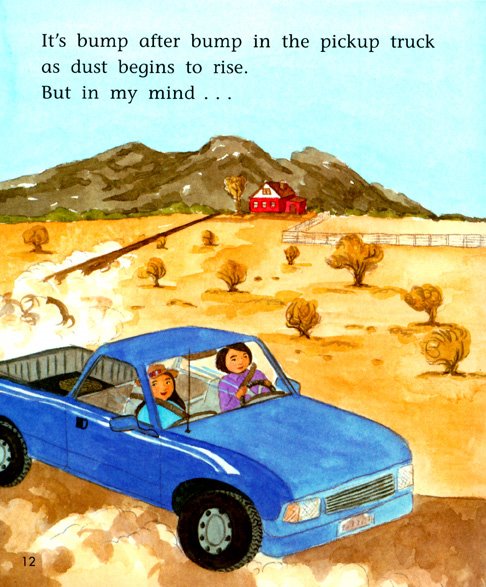
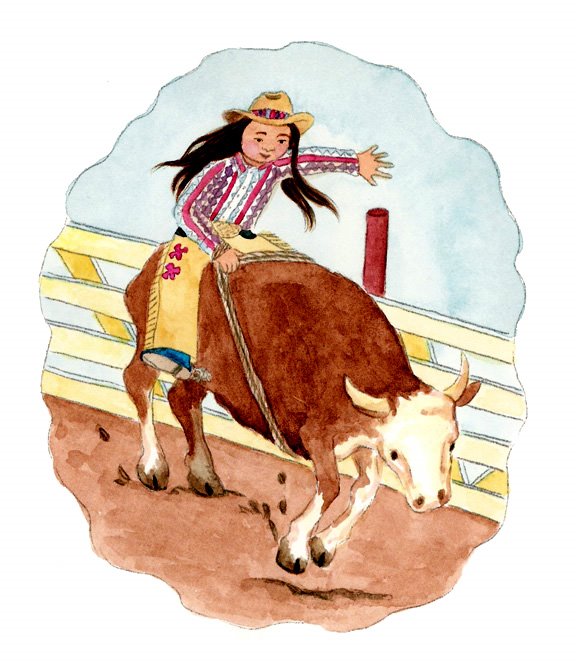
In the meantime I did have requests for copies of a recent book of mine, I'm Heading to the Rodeo, and so I bought a few copies from the publisher directly. The book is about a young girl who dreams of being in the rodeo. Here are some sample pages from the book:This paperback book is available in both English and Spanish editions. If anyone is interested in a copy, please email me at clairelmilne(at)hotmail.com. I'm selling this book at cost, which is $8. It's a must-have if you love horses and/or the rodeo!

Read more...

Wrist pincushion

>> Friday, March 10, 2006

As promised, here this is my new wrist pincushion. Although I did say it would be blue, so I did end up using a different fabric than planned.

I've been meaning to make one of these for ages, literally years, and never got around to it. But lately I've been inspired by all the great pin cushions I've been seeing on Flickr and other blogs. I've already mentioned Nicole at Craftapalooza's beautiful creations, she made this pincushion tutorial at whip up. And the next step will be covering my tape measure using this tutorial! Can I just mention that I can't even keep up with all the great posts at whip up. It's such an inspiring site.

My wrist pin cushion followed Nicole's instructions to start. Then I sewed a ribbon to the back and hemmed the edges of the ribbon and added a snap closure. Next I cut a circle of cardboard a little smaller than the pincushion. I covered this with fabric and sewed it to the back of the pincushion. I'd like to think that I wouldn't stab myself with pins while using the pincushion, but I prefer not worrying about it and having the cardboard backing there! Because let's face it I'm the person who lost forty-four needles in the old one. Obviously I'm not as careful as I could be. And to make one last disclaimer on that front, I did actually have that pin cushion since I was a kid, so we're talking decades of sewing. And in case you're thinking "aww, you had it since you were a kid? Why did you cut it up?" I must reiterate that it was a drab old ugly tomato - and they haven't changed as far as I can see.

There are lots of other handmade pincushions that have inspired me. Of course there are Bella Dia's gorgeous creations. I don't know if I could put a pin in them though, they're more like works of art! Also, I was inspired by Michelle at Green Kitchen who has made some pretty pins for her lovely pincushion. And finally how inspiring are these gorgeous pins at Wee Wonderfuls? I'm planning on making some of those next.

p.s. there was a question about Kate - all her measurements are given in the knitty.com pattern. If you use thinner yarn and a corresponding smaller needle size she'll end up looking the same proportionately but a bit smaller, which is what I did for the blue version.

Read more...

New pincushions

>> Thursday, March 09, 2006

I was so tired of my old red tomato pincushion. I had the same one you see in every sewing store and in discount sewing kits for a long long time. Which is ridiculous because 1. I use one all the time 2. I know how to make a new one and I have plenty of fabric 3. I've been coveting the gorgeous ones made by Craftapalooza (gosh I love her things. Look at this and this.) And 4. I love having beautiful things around me, not tired old tomatos.

So I cut the old tomato up in order to use the filling, and also so I could retrieve a couple of needles that I was sure had disappeared inside. You know how that can happen? Well I shook the sawdust out into a ziplock bag and needle after needle kept appearing. And I plucked them out of the sawdust and put them aside. And they kept falling out! It turns out I had FORTY-FOUR needles hidden inside my old pincushion! Am I the only one that finds that really kind of weird? Yikes. Turns out I don't really care for sawdust as a filler so I threw it out.

These pincushions were made using the instructions in the latest Martha Stewart (yes the one for grownups!). My girlfriend (the same one I just gave the Kates to) has a subscription but doesn't care to keep them, so she gave me her February and March issues. Usually I'm not that interested in the gardening issue because I don't have a garden, but that's the one that has the pincushion instructions because they're shaped like tomatoes.

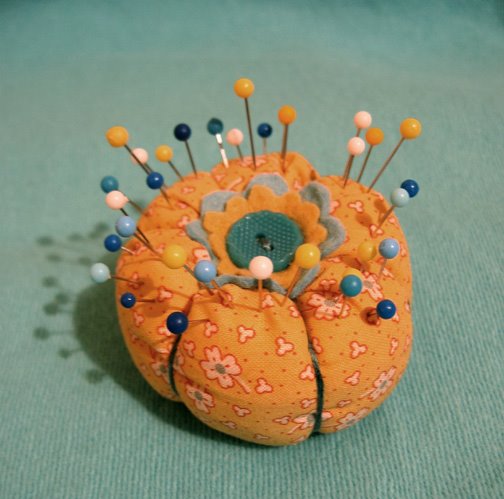
I did find it a bit more difficult than expected to get the sides smooth. There are a few little puckers here and there. But overall I was very happy with them. I used some fabric that I had bought at the quilter's store while looking for my knitting bag lining. I think small floral prints look best on small items, otherwise they can look a bit busy. This is what I had in mind when I bought the yellow. I'm really loving yellow these days. It's also so nice with blue, especially turquoise.As you can see, I changed mine a bit so they don't look like tomatoes. They have flowers cut out from wool felt on top with vintage buttons. The bottom sides have vintage buttons too:And I had a lovely time sorting my pins by colour. Next I'm going to make a blue one and add a strap so I can have it on my wrist and really look grannyish.

Read more...

Kate's little brother

>> Wednesday, March 08, 2006

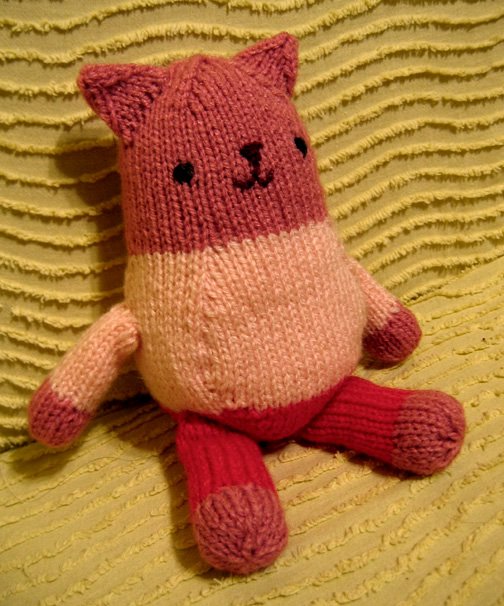
I finished making a boy "Kate" today to take as a present for my girlfriend who just had a little baby boy. I make it a rule to bring a present for both children when there's already one in the family. So the pink Kate is for her 4-year old girl and the blue "Kate" is for her baby boy. After all my worrying it turns out they were well received... This particular friend isn't a yarn snob and in any case I think she appreciated the fact that they could both be thrown in the wash without coming to any harm. Thanks to everyone for their advice and comments. The blue one is a wool/acrylic blend so I like the feel a bit better but it's still practical.

I sorted out my magazines, and it turns out I have thirteen issues of Martha Stewart Kids and four issues of the short-lived Martha Stewart Baby. These magazines started out as special editions, so maybe there will still be some more special editions of these magazines down the road. Of course the information about Kids ending soon came from someone working on the phones in the subscription department, so I don't know what's going on for sure. The only thing I know for sure is that they weren't renewing subscriptions, but that my current one would be completed.

My friend who was working in Japan has returned and he brought me the books I had requested and a couple more as a surprise. They're wonderful!! I'll be showing some pictures and making things from them soon.

Read more...

The most beautiful swap package ever

>> Tuesday, March 07, 2006

Today was such a happy mail day! My swap package from Blair arrived!! I've been anticipating it so much because I knew I would love it. And it was SO WONDERFUL!

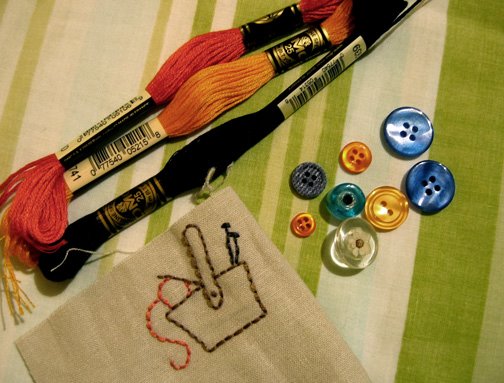
Sit back because I am going to show you a picture of each and every thing in my lovely package. The picture above is the beautiful Japanese fabric pouch with an orange lining. I had to show the lining because the contrast is so beautiful. The decoration on the front is this embroidery:
I love it so much! There's something that is quiet and serene about it. Inside the pouch were some embroidery flosses, some pretty buttons, and another little embroidery of a knitting basket! Hmm, perfect decoration for a new knitting bag.
And speaking of sewing, this is the wonderful fabric that inspired the swap. This all began when Blair asked if I would like her to send me some of this fabric (the one on the right) after she saw me comment about it on Flickr. I've heard it's available at JoAnn's, but we don't have that here in Canada and I didn't see it in the online shop. This is a really big piece - more than I expected! Plus, look at the charming tartan next to it...that was just something extra. I can't wait to sew something with these.
And last but not least, look at this pretty cloth flower brooch! It's going on my coat immediately. I love the colours, I love polka dots, I feel as if Blair really knows me because this is so me. Thank you thank you thank you Blair! As you can see I am absolutely over the moon with my swap package!
In other news, my Martha Stewart Kids arrived today too. See what a happy mail day it was? This is the only magazine I subscribe to, because I always always want to buy it whenever I saw it on the shelves. My excuse is that despite the fact that I don't have any kids, I'm a children's illustrator. So it's good for me to keep up on the children's publishing market, right? The magazine really is filled with exceptional illustration talent. My favourite part is the middle section, which contains the "how now" magazine just for kids. But the truth is I love everything about the magazine. I love the design, the photographs, the crafts projects, the decorating, the little meal ideas, I want the monkey birthday cake, I've made the little flower beaded hair pins.

So I was very disappointed to hear that they aren't going to renew my subscription...it looks like they may not be continuing the magazine. I have seven issues - I'm not sure how many there were - so I will just have to treasure those. I'm also sad about it, because illustrating for Martha Stewart Kids was my dream job, I was even planning on sending them a special self-promotion package with a handmade book.

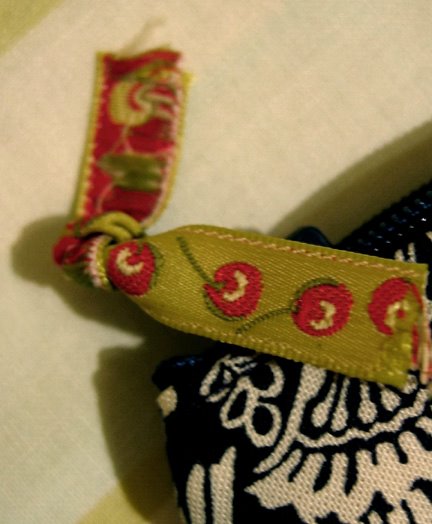
In case I'm not the only one disappointed about this, I will end on a more cheerful note, here's one last detail from Blair's package, look at the charming little cherry ribbon tie!

Read more...

Pink Kate

>> Sunday, March 05, 2006

Finally my illustration promotion packages are out! Each publisher received an envelope with 6-9 printed samples, a personalized letter and a business card. Part of the work was just finding all the addresses and making sure they were up-to-date. Good thing I checked because one of the publishers had gone out of business since my last package. It's a nice feeling knowing that the packages are out there, hopefully being well-received. I realized after this that the last time I sent a batch of self-promotions out was in 2003, so it was long overdue.

In other news, I finally tried out the very popular "Kate" pattern. I used an unknown fibre yarn, probably acrylic and I have to admit I can't shake my yarn snobbery. It was going to be a gift for a little baby, and I was thinking initially that a mum would appreciate being able to throw it in the wash. But if it's someone who knows their fibres, they probably wouldn't like the acrylic either. The skeins felt fairly soft but there's a slight synthetic feel that bothers me. I'd like to hear people's opinion on the natural fibre/synthetics for toy making. It's too bad, because the colours were so nice and cheerful for a little baby and of course Kate herself is so lovable! So I think I will make another one in wool and it will just have to be a hand wash toy. It was good practise though, and now I think I'm ready to design my own.

p.s. I just saw the Nanny McPhee movie and it's wonderful! Emma Thompson is so brilliant. The Nurse Matilda books were some of my favourites growing up so I was really happy that the movie was so good.

Read more...

Swaps - how to do it

>> Friday, March 03, 2006

A lot of people ask me about swapping. They want to know how it's arranged and how it works. I have to admit that one of the main reasons I wanted to start a blog was so that I could participate in swaps. It was the last back-tack that put me over the edge - those packages were so amazing!!

There are a few different ways I've arranged swaps. Sometimes people offer something to people who comment on their blog. Then I make a package for them in exchange. I've offered things to people on my blog, the winner of a recent quiz was sent a handmade present (still a secret) recently, and now we are swapping ATCs too. There are official swap groups such as the aforementioned Color-iffic swap-o-rama. That one is based on a colour theme.

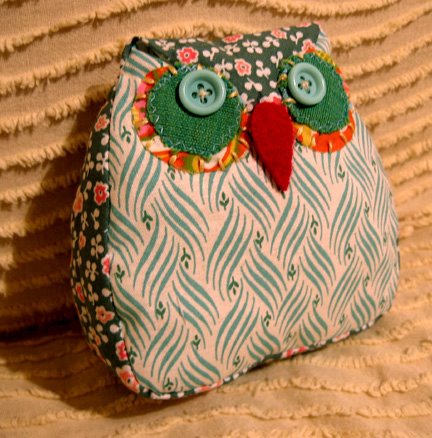
This is the package I received today for the Green Color-iffic swap-o-rama. It came from Claudia of chestofdrawers - we had already swapped before! For the previous swap I sent a kid's embroidery book and she sent me lots of fabric and goodies. I love my green package, my favourite thing of course is the beautiful owl she made for me pictured at the top of this post.

Package includes, fabric, ribbon, pencils, apple notebook with apple stickers, bookmarks, letter paper, green window paint, green pencil sharpener (looks like a little can with cute graphic), half circle sticky notes, pretty green fish that goes in the bath and releases flowerlike confetti, turquoise sequins, and last but not least frog magnet. It's all wonderful, thank you Claudia!

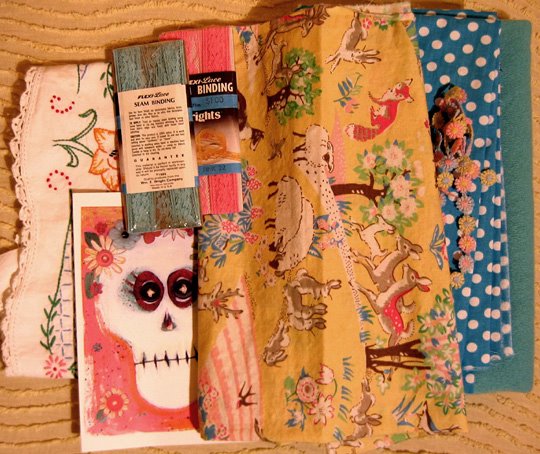
Also on Flickr are other swap opportunities. One group is for fabric, you post pictures of fabric or other craft relating things and if someone likes it they will offer to swap with you. I did that recently, and sent the fabric and a few extras and received this pretty package from green kitchen. I love it, thank you Michelle!
Here's a close-up of that adorable animal fabric:I've also had a certain lovely person offer to send me some fabric, just because she saw me comment about it on Flickr. Of course I was so pleased I made her a package in exchange.And recently I received a surprise package from Teresa! She sent me turquoise rick-rack, flowery fabric, pretty liberty card, vintage buttons, lip gloss that looks like a candy, flower beads, and a ring made of amber and copper coloured beads - not in the picture because I am wearing it!! I loved everything, Teresa and I had swapped before and she wanted to send me something extra - it was such a nice surprise!

These aren't even all the swaps I've done or all the kinds of swap opportunities. Generally I think it starts with comments and mutual admiration. Then a bit of emailing. If you have a blog it's great because then the person can see what you like, you know what you have in common and it gives you ideas/inspiration for what to send. If not, the next best thing is Flickr, where you can post pictures and comments and scoot around "meeting" people. I've found that most people like to swap because it's always so nice to get packages in the mail.

Read more...

Illustration Friday - Tea

>> Thursday, March 02, 2006

*click on the illustration to see it larger*

I was thinking about the Illustration Friday topic this week, of "Tea" and as I was snoozing this morning an image kind of popped into my mind of an elephant having tea. I pictured the elephant next to a delicate little tea table. This morning my agent, Bradley, called to remind me I hadn't posted any illustration in few days and since I like to draw things such as the squirrel's tea party (that's an old one!) he thought I should add a Tea illustration to my to-do list for the day.

I've been focused on finishing my self-promotion packages which still haven't actually gone out. I've been working on the cards for some time, and then there's finding the updated addresses, printing labels, printing the cards, and assembling a package for each publisher with a letter, business card etc. Some publishers ask for SASEs, which I usually don't send because if they don't want to hire me I don't really like getting a letter telling me so. But I do occasionally get an encouragement, a please-do-keep-sending-samples reply, so I include a SASE if they ask me to. In short, I thought this should be my main priority this week, but then again something is wrong if I can't take time out to draw an elephant drinking tea.

This one was good practise for me because before I even started down to sketch I had to think about it. Is the elephant going to pick up those teacups with those thick legs? Or possibly just dip the trunk in for a sip? Does it even matter? Creating whimsical animal characters can seem very simple but if something isn't quite right it just looks awkward. That being said, there's lots of room for the imagination, and I generally have to work on being less logical about it. After a quick blogging-world trip, I was inspired by Molly Chicken's lovely site, the cheerful colours, the delightful Frannie, her adorable bear, and the package she just received from the talented Marion whose site is called tea-time! If that's not a sign I don't know what is. (her site has some pictures of bird teacups that I am now coveting madly even though I just discovered they exist..)

Once I sat down to sketch, this is what emerged, and I realized it was actually a little girl elephant and she was sharing the tea with a very small friend... p.s. I think I'll call her Ella!thank you everyone for visiting!

Read more...

Pink hat

>> Wednesday, March 01, 2006

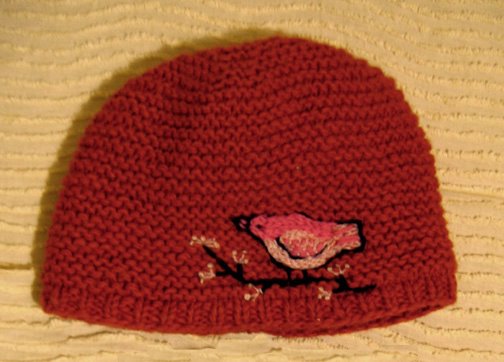
I received some beautiful pink wool in my Red/Pink Color-iffic swap-o-rama package. It's a merino/microfibre/cashmere blend called Debbie Bliss cashmerino superchunky. I decided it was the perfect wool to make a new hat. Some may remember the orange hat I posted here previously. If not, here it is: I bought the orange hat and embroidered it with a bird on a branch. I really like the shape, so I thought I'd try to work out a pattern for it. What I came up with worked out quite well (after lots and lots of frogging), although I had to resign myself to buying a 2nd ball of yarn in order to not be left with what basically amounted to a beanie. After a trip to Romni I have to say thank you again to my swap partner because it was expensive ($20/ball)! It's worth it because it really is gorgeous, it's soft, heavy, lovely to knit with and even nicer to wear. Plus I have another 1/2 skein left and I'll make something else with that.

And finally, I was inspired by the beautiful felted wool decorations on Ingrid's scarf, and I made a similar decoration for the pink hat. I stole some teeny bits of Bradley's current scarf wool in navy blue, tan, dark green and orange, and made little felted balls and a leaf. I love the way they look against the pink. Here's a picture: One person on Flickr asked me if I had a pattern for the orange hat, and so I'll share how I made it for her and anyone else who might be interested. First I have to say I'm not an expert knitting pattern designer, so as you can see in the picture the stitch decreases show. If anyone would like to suggest improvements, or point out mistakes, your feedback is welcome.

Pink hat pattern
Ingredients: roughly one and a half 100 gram skeins of Debblie Bliss cashmerino superchunky, or wool yarn of similar thickness. Gauge: 10 stitches of K1 P1 rib is roughly 3 inches wide. I think I have a somewhat large head, it's roughly 23 inches in circumference.

• CO 72 stitches using 4 mm (size 6) circular needles, add a marker at the beginning
• K1 P1 rib for 3 rows
• switch to 6mm (size 10) needles. K2, K2tog, add a marker halfway around circle, at marker K2, K2tog, then knit to end (70 stitches remain)
• purl row
• Double decrease row: K2 K2tog, knit until marker, K2 K2tog, knit to end (68 stitches remain)
• purl row
• Double decrease row (66 stitches remain)
• knit row/purl row six times
• Double decrease row (64 stitches remain)
• purl row
• Double decrease row (62 stitches remain)
• purl row
• Double decrease row (60 stitches remain)
• purl row
• Double decrease row (56 stitches remain)
• purl row
• Double decrease row (54 stitches remain)
• purl row
• Double decrease row (52 stitches remain)
• purl row
• Double decrease row (50 stitches remain)
• purl row
• Double decrease row (48 stitches remain)
• purl row. add 2 more markers between the first two so that the circle is divided evenly into four sections
• Quadruple decrease row: K2, K2tog, knit to next marker, K2, K2tog, knit to next marker, K2, K2tog, knit to next marker, K2, K2tog, knit to end (44 stitches remain)
• purl row
• Quadruple decrease row (40 stitches remain). switch to 5mm (size 8) double pointed needles
• Octuple decrease row: K2, K2tog twice, knit to next marker, K2, K2tog twice, knit to next marker, K2, K2tog twice, knit to next marker, K2, K2tog twice, knit to end (32 stitches remain)
• purl row
• Octuple decrease row (24 stitches remain)
• purl row
• Octuple decrease row (16 stitches remain)
• K2 tog eight times (8 stitches remain)
• purl row
• cut yarn, pull thread through remaining 8 stitches and tie/stitch it down
• weave in ends

Add decoration as you wish, embroidery, appliqué or leave it plain. You can switch colours to make it in two colours, or stripes, or blend yarns. I made felt balls by winding separated "ply"s of wool into a tiny ball, then rolling in my hands using soap and hot water intermittently.

Read more...
The arrival of Ingrid

>> Tuesday, February 28, 2006

First of all I have to say, congratulations to Stephanie of Yarn Harlot! I was really getting worried about her because it sounded impossible for her to finish her Olympic knitting and I knew she would feel awful about it if she didn't. That sweater is so beyond anything I'd attempt myself! I mean, plackets? steeks?? And here I was thinking I'd gone the extra mile with the woodworking. It goes to show, she really did choose a real challenge and deserves the medal.

In other news, as you can see from the picture at the top of this post, I had a very cheering package arrive this morning. I've been feeling a bit under the weather for the past couple of days so it was perfect timing for the arrival of the delightful Ingrid! Here she is sitting on my couch (which is currently covered with a recent thrift acquisition - a cheerful yellow (I can't remember what you call this tufty fabric) blanket).And as you may notice, she even came with a little bundle of fabric tied with a little brown velvet ribbon. Did I mention even the tissue paper she was wrapped in was beautiful?And they're such pretty fabrics, the picture doesn't do them justice. At first I was thinking, "oh these are just too pretty to use" then I remembered how in fairytales babies are sometimes left in baskets on doorsteps with a few extras tucked in. I chatted about this with Bradley this morning, and he agreed that the baby always came with a blanket, and sometimes a broken locket so it could be matched up with the other half later in life (consider Oliver Twist, and Little Orphan Annie). So obviously this fabric belongs to Ingrid, and it's up to me to look after it for her. I'm still deciding, but my initial thoughts are as follows:

1. pink floral: little tote for her to carry her things around in/extra apron
2. stripy flannel-like fabric (sorry I don't really know my fabric names): pajama pants
3. brown polka dot cotton: dressier handbag for fancy occasions and/or skirt
4. blue wool felt: shoes?

Thank you so much for the lovely package, Stephanie! I'm delighted with Ingrid and you can be sure she has a happy home here with us.

Read more...

The Knitting Olympics - closing ceremonies!

>> Sunday, February 26, 2006

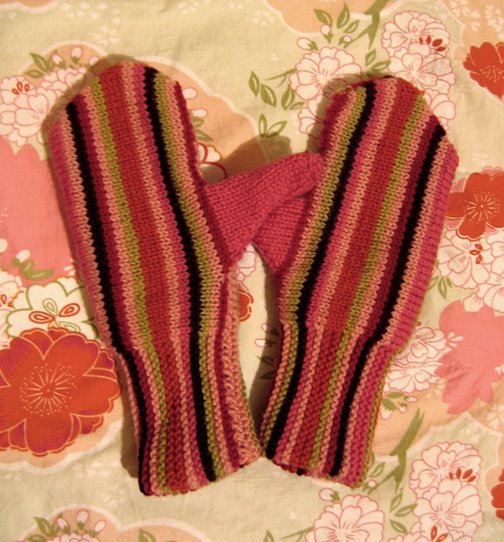
Here are Bradley's Knitting Olympics mittens - they're finally done! I love them and they fit me perfectly. They're going to be just right for spring (which seems to come and go every week these days). The fabric in the background is from a dress I bought at Goodwill for $4.99 - so that I could use the fabric. It's a Japanese-inspired print in all my favourite colours. I'm probably going to make a bag with it.

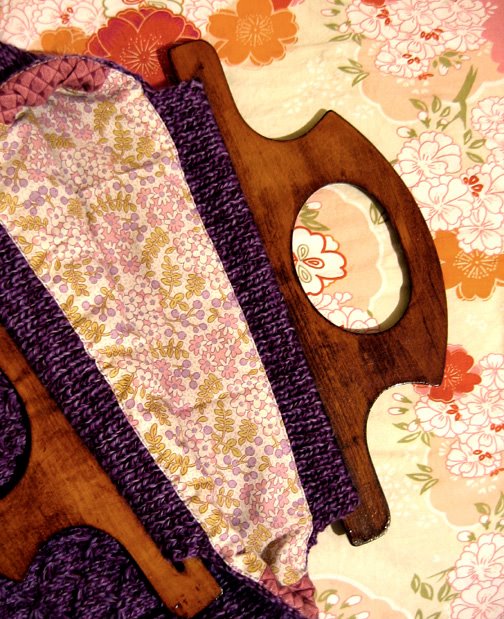
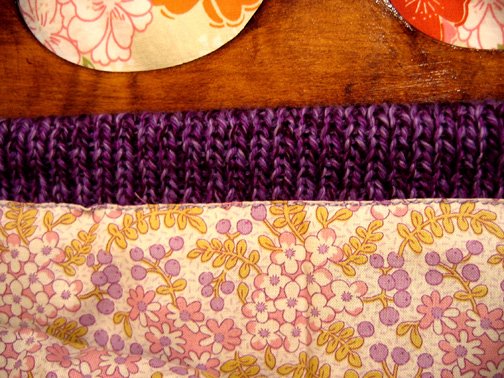
I've also finally lined my Knitting Olympics purple retro knitting bag with a fabric I found at the last minute. It's a new shop I discovered in the east end, near Victoria Park, called The Quilter's Garden. They have a general selection of quilting fabrics, and some 30s reproduction fabrics. I chose a bluish purple floral, but didn't like it so much when I got home, so I used another 30s reproduction fat quarter I had bought. I didn't quite have enough and used another fabric for the side panels. I can cover that later though by adding some pockets in the 30s fabric. Generally I'm very happy with it and thank you everyone for the nice comments. I didn't want to bore anyone with yet another picture of it, but I thought I should show it now that it's really finally actually done. I've decided to leave the sides open, not stitched together at the top.Here's a detail, I really love this fabric:
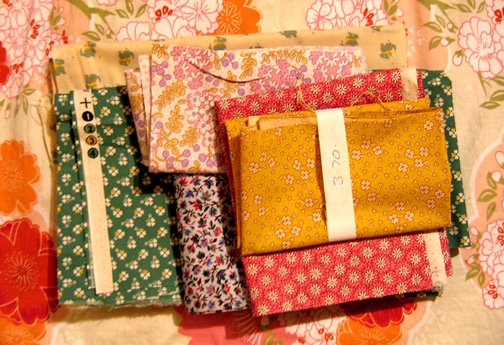
Pictured below are the other fabrics I bought at the shop. Most of the reproduction fabrics are $13-16 per yard so they're not cheap but good if you want something right away, and you can see them in person. Otherwise I think ordering online is much cheaper - and more selection. I bought the two green fabrics at the bottom of the pile for the Green Color-iffic swap-o-rama, I'm going to sew something from them to go in the package I'm sending. The one at the bottom is very cute, it has some little scottie dogs on it.
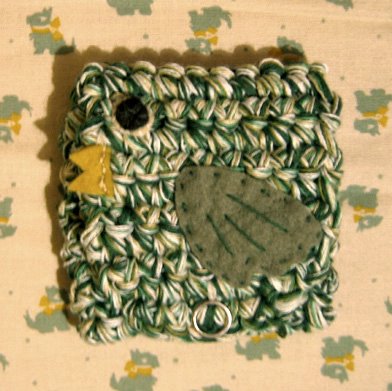
This is the other little thing I made for the Green swap, it's a coin purse with a front flap decorated with an appliqued bird and a snap closure. The recipient for this Green-themed package is still a secret - I hope she likes it!

Read more...

Knitting Olympics - almost done!

>> Friday, February 24, 2006

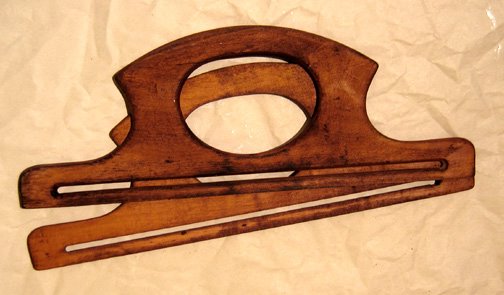
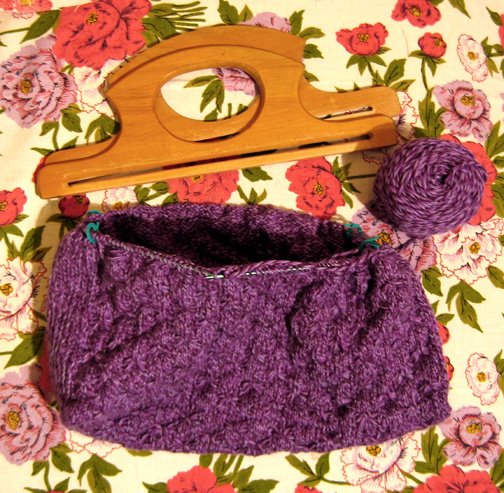
Well I didn't really expect woodworking to become part of my Olympics Knitting project, but it seems this is the case. I've now sanded, stained three times, and varnished the handles. I needed to lightly sand and varnish again today. It has a slight varnish smell which I don't care for but hopefully that will quickly fade. I'm also wondering how long it will take before the handles feel nice and smooth and not like they've been varnished the day before.

I haven't attached the flaps at the top yet, I just folded one flap quickly through one of the slots to show how it will work. The sides get sewn too so that they are tucked in. But I'm not sure I like it because then the bag doesn't open up as much. So I have to think about that and also how I will line it. I was planning to maybe use the fabric I keep photographing it on, but I was hoping to find something I like better in the meantime. I kept picturing more purple, such as a purple floral pattern on a purple background. In any case, I'm very happy with how it turned out, I didn't really worry too much about the gauge, but somehow it turned out exactly right, even including the size of the wooden handles and slot inside them (I guess those are a standard size).

Thanks to the retroknits person who posted the pattern but isn't there anymore for the beautiful pattern, and thanks to Yarn Harlot for the great Knitting Olympics idea!

Read more...

Feeling green today

>> Thursday, February 23, 2006

I just made the cosy on the right for my friend's birthday. She had seen my bird cosy (on the left) that I had bought and she thought it was really cute. So I decided to make her something similar. Mine was bought at an adorable little Japanese store (I wish I could remember the name) just west of the Japanese Paper place on Queen West. It's a baby goods store, but also has cute things for anybody. I also bought a little set of wooden letter stamps there.

I rode my bike up to see her, it's 45 minutes to her office, I used to do it every day when I worked there too as a graphic designer. It was really nice to be riding my bike. This time of year I don't really consider it much, but there's really no reason not to because there hasn't been much snow, and today was 5 degrees. I pretended it was spring...The green cosy idea came about because I've been working on my swap package for the Color-iffic swap-o-rama. It's a Flickr group, anyone can sign up and you send your secret partner a package and receive one from someone else. I did the Red Pink swap, and now it's the Green swap. Your package should include one handmade thing. I think most of the people who participate like crafts, so most people include things like beads, ribbon, yarn etc. It's fun to go to your partner's Flickr photos page and see what kinds of things they like. This cosy is my first handmade thing - I'm still working on the package.

Read more...

Ribbon belt

>> Wednesday, February 22, 2006

I saw someone wearing a nice ribbon belt the other day and decided to make one. I thought I might as well show how to do it too, because it's so easy anyone can do it but maybe they just don't know how. Although it's possible that either you know how to sew and you're thinking "um, duh, I think I could figure that out" or you never sew and you're thinking "as if, I don't think I'll be doing that any time soon." Hopefully there will be someone in the middle who will say "cool! I'd like to do that and now I know exactly how!" See what I go through when I blog? It's amazing I write anything at all with all my worrying about what people will think. (This is why I'm always so appreciative of the nice comments and emails I get.)

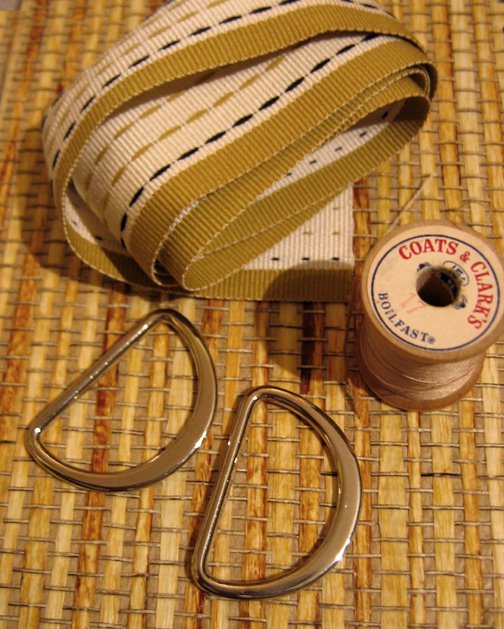
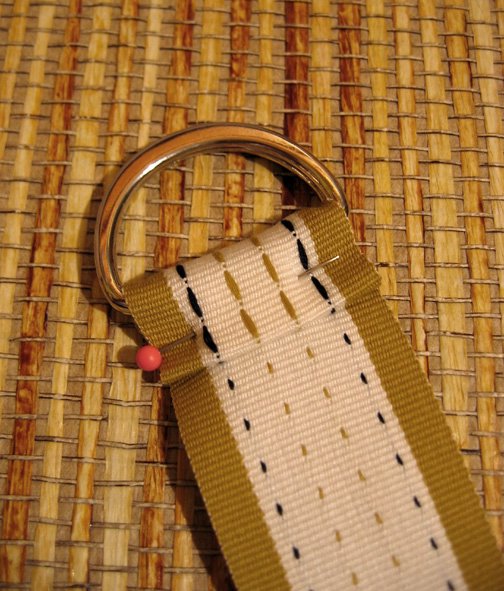
The picture above shows the ingredients, things you just might have lying around. If not, the metal rings are called d-rings, and they sell them at button/notion/sewing stores. Some of them have a little gap in the middle, but these ones don't and I think they're a bit nicer but harder to find. I found them in the Trimcité store in Montréal. (Incidentally my friend just mentioned to me that he had never associated Montréal with so many crafts stores before. I might mention that you have to make some effort to find them, I didn't mean to suggest that Montréal was some kind of yarn and button wonderland).

Step 1: Wrap the ribbon through both d-rings and pin it down with the end folded under (so that it doesn't get frayed). Sew this in place. I sewed it by hand using a running stitch, then back over filling in the gaps. This way it looks like machine sewing (the same on both sides) and it's secure.
Step 2: Hem the other end.
That's it! You have a cute ribbon belt. It works best if the back of the ribbon is the same as the front, or if the back looks nice too since it will show.
In other crafts news, I sanded (briefly) the handles for the purple retro knitting bag, and added the first coat of stain. It has some obvious flaws but I wanted it to still look vintage so I'm happy with it so far.
And last but not least, I am the proud new owner of one of Stephanie's (little birds) beautiful kittys! Stephanie's etsy shop was filled up yesterday but is emptying out really quickly. My kitty's name is Ingrid and I can't wait until she arrives!

Read more...

Knitting Olympics and lucky me

>> Monday, February 20, 2006

Things are going well with the Knitting Olympics, this is the progress so far on the purple retro bag. I bought a stain and varnish for the handles, and sandpaper and tack cloth. It really adds up just to treat this little bit of wood. Too bad I don't have a workshop for that sort of thing. I considered approaching my dad with the project, but I kind of wanted to do it myself, as part of the challenge aspect and all that. I did consider painting with acrylic paint but I thought I might be disappointed with the flatness. If I don't like the stain I'll go over it with black paint before I varnish. The main thing is that I think the light pine colour doesn't really go with the purple, plus it's not in very good shape, with patchy unfinished areas.

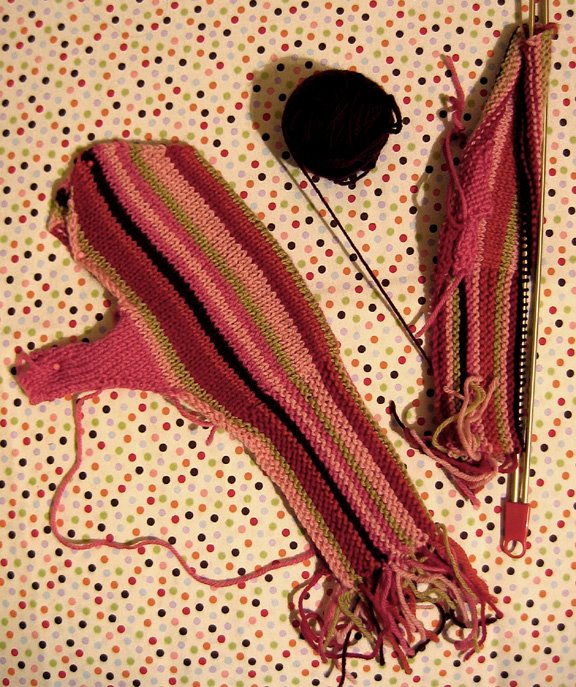
Bradley's Olympic mittens are going really well. I can't wait to wear them! I know I keep saying it, but you don't know just how nice they are, they're made with a lovely soft light Wool Gatto, and the colours!!
Here's a detail. It's hard to get the colours in the picture just right, the dark stripe is actually a dark burgundy.

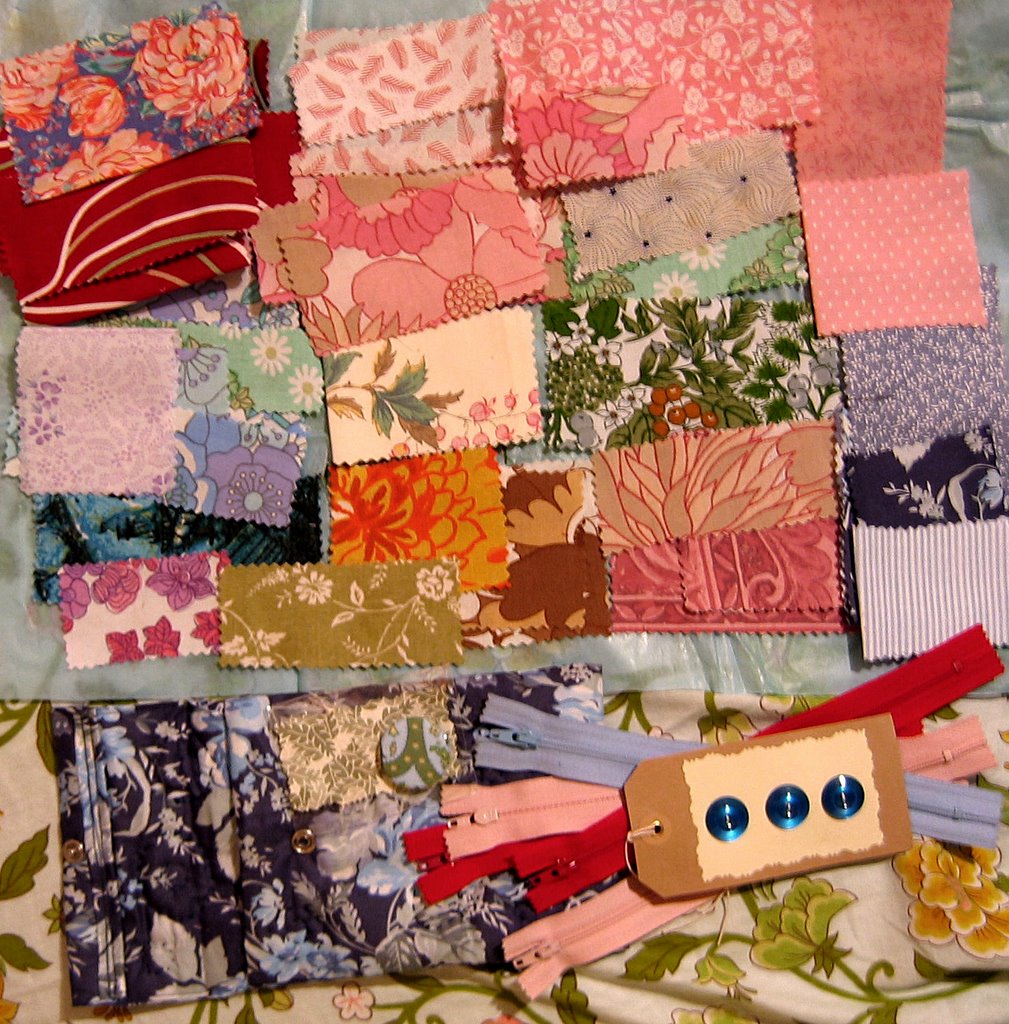
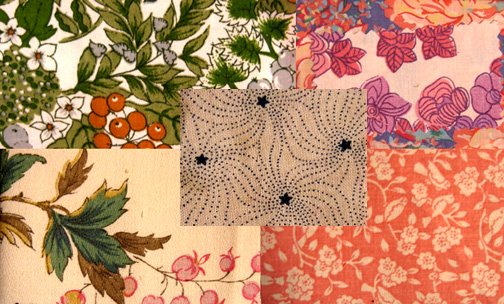
And along the hopefully not too annoying "I'm so lucky" vein, look at the glorious package Manda sent to me! She was sorting out her fabric supplies and offered to send fabric packages to commenters on her blog. Naturally I piped up and look at what she sent! So much more than I expected, wrapped beautifully in a soft dark blue floral pouch she made, and with little extras, zippers in my favourite colours and beautiful buttons. I was so pleased with this package I can't tell you, it was an emotional moment.Here is a detail of my favourite ones. How lovely are these?? My favourite patterns are of flowers, plants, leaves and things like that, but even better, the one on the bottom right has birds too. Thank you so much Manda, I'm working on a little surprise for you too.

Read more...

  © Blogger template Simple n' Sweet by Ourblogtemplates.com 2009

Back to TOP