Showing posts with label wool. Show all posts

Winter pompom wreath

>> Saturday, December 24, 2011

Once again inspired by the pompom festival at City of Craft I used pompoms to decorate our winter wreath. I was also inspired by some beautiful wreaths I've seen made from succulents. I love the mix of blue-greens.
So this one is essentially a tube (5" x 36") of thick wool fabric sewn together into a circle then squeezed into a wire frame to hold its shape. It was a bit of a rush job, so I think I may add some more details later, but for now it just has a few wool leaves sewn on, then pompoms and wool flowers clustered in one corner at the bottom. To finish it off I added a velvet ribbon and a store-bought bird that was amongst our decorations pinned in place in the centre.

This wreath was very easy to make, just cut flowers from wool felt in a variety of sizes and colours and layer them up, then create a few pompoms. I pinned everything in place before sewing it down to make sure I liked the arrangement. If you want to be extra quick you could bring out the glue gun and attach everything that way. Another option is to use a wreath form and cover it with yarn wound around it, then attach the decorations.

Happy holidays to everyone!

Read more...

Last post before City of Craft!

>> Friday, December 09, 2011

I finally finished some new wristlets in time for City of Craft - well they just need their snaps.
Can't wait for tomorrow! Well, I can wait because there's still so much to do but you know what I mean.

Read more...

City of Craft - bird clutch

>> Wednesday, December 07, 2011

Here's something new I created for City of Craft coming up this weekend. It's a new design - a larger clutch with a wool felt chickadee applique on the front. Inside there's a matching wool tweed facing and then a faux bois fabric lining on the bottom. I busted out my fancy new floral labels for this one!

I also made some new pompom birds since the last batch sold out at the Handmade Holiday show last weekend. Thanks so much to everyone who visited. I picked up a few nice treats myself.

Here are the details on City of Craft this weekend:

City of Craft
December 10 & 11
Saturday 11-6pm
Sunday 11-5pm
The Theatre Centre 1087 Queen St. West
Thrush Holmes Empire 1093 Queen St. West
http://cityofcraft.blogspot.com/

As you see, this year there is an additional venue, the Thrush Holmes Empire. I'm in the Theatre Centre again, downstairs in the middle of the left wall as you walk in facing the stage. I love City of Craft, and I'm predicting that it will be as wonderful as always. Hope to see you there!

Read more...

New camera, new shop

>> Tuesday, August 16, 2011

I have a new camera! I'm quite excited about it, but please note I haven't read the manual yet. Due to a modest budget, I bought it on craigslist, but to me it's pretty fancy. It's a Canon Rebel XT and I'm so happy to finally have a DSLR after using my little point and shoot for so long. (I used to love my old SLR but couldn't cope with film anymore.)

So to celebrate, there's lots of new things in the shop today, including the little coin pouch pictured above. It started with a fabulous super-wide vintage tie that I had to buy despite the fact that buying a tie for the fabric doesn't make too much sense. It had a hole in it, so I had no compunction about pulling it apart, washing it and cutting out pieces for my pouches. It turns out you can get a surprising amount of fabric from a nice wide vintage tie. I have more of these pouches in a variety of sizes so if you have a request let me know and I'll add it to the shop.

Oddly, the final motivation to get the new camera was those blue quilted pouches (mentioned in my last post) whose colour just wasn't coming out right in the photos. And in the end the blue wasn't quite right with the new camera either. I guess it's just a hard-to-capture blue. Is there such a thing? I'm not sure but I'll be doing my best and getting those into the shop shortly as well.

And sometimes it doesn't matter what the motivation is if it works out in the end. I'm very happy with my new camera. Good-bye autofocus!

Read more...

Tour de Fleece - sort of

>> Thursday, July 29, 2010

In June we were watching the FIFA World Cup. Bradley was waking up early every morning to watch it before going to work. Then that was overlapped with the beginning of the Tour de France and he started watching that every morning. Now that it's over I kind of miss it. How likeable is Andy Schleck??

So I had heard about the Tour de Fleece but never participated. If you Google it you'll find lots of blogs with spinning posts. It's just like the Knitting Olympics but for spinning. You set yourself a spinning goal and spin while the Tour de France is on.

This year I unofficially joined up with the goal to finish up a few spinning projects. I had little bundles of spindles with partly spun roving stashed all over the house. So now I can show you some more of my finished yarn!

I've decided that with all the work I was doing spinning fine (and trying to be even) singles, I would try keeping more of my yarn as singles. I like having thinner yarn and more yardage. A single isn't as strong as plied yarn but depending on what you're making it can be fine. And they're so pretty!
The first skein I finished was a silvery grey corriedale that was part of my birthday present from Bradley. It's a nice fat skein, kept as a single ply with just a wash to set the twist. (When yarn is freshly spun the twist is still "active" so setting the twist means finishing the yarn so that it's ready to be knit or crocheted.)

I can't remember if I've explained how I set the twist, but all I do is wind the yarn onto a pair of purse handles and soak it for a while in warm water. I add a little bit of hand soap (Body Shop Satsuma) just so it smells nice. This also washes the yarn a bit extra in case the fleece wasn't perfectly clean beforehand. Then I rinse the wool, gently squeeze (not wring) out the excess water, whack the skein against the side of the sink - just a couple of times - then hang the yarn to dry. I put a light washcloth inside the loop of yarn so that it doesn't tangle and I find it helps absorb some of the water so that it dries faster. If the weather is nice I hang the skein in our backyard - a skein dried in the open air has a lovely fresh smell.
The second skein I finished was the Rusty Ship merino that I dyed myself. I had spun half of it already and it was sitting on a bobbin. I love how this one turned out. Keeping the singles makes the colours more distinct, with just a little subtle candy-caning (ie. two colours twisted together for a candy cane stripe effect).

Here's a detail:
Then lastly, I finished a nice rich brown Shetland from Lettuce Knit. I love Shetland, it's lovely to spin and the finished yarn is soft and cushiony.
It feels good to get some WIPs all finished. Also I like having some nice skeins ready for the fall when I'll start to feel like making some new winter knits.
But today was not all good, someone took a big bite out of our first homegrown tomato! Bradley planted peas, carrots and beets this year, and I planted some already started tomato plants from our local market and a herb garden. Everything seems really slow to grow, and we finally had one of the tomatos turn a little bit orange.. and just as I was thinking I should probably bring it in, there it was this morning with a big bite! Boo.

Read more...

Lacy camera case

>> Wednesday, July 28, 2010

I know I've been neglecting my blog when I find cobwebs on my camera tripod. Sorry to have been away so long! I had a tight illustration deadline that was keeping me busy and after a couple of weeks I tend to get out of the habit. As usual I can't show you the artwork until the project is published so I'll try to remember to show you later on.

Incidentally I've started getting a lot of "advertising" comments on my blog which means a comment that's really just a link to a business. Some of the businesses are.. um.. not family friendly.. and it can take ages to delete tons of these automated comments so I've had to add moderation to any comments on posts older than 2 weeks. This means that sometimes I don't see comments right away because the moderated comments only show up when I log in to write a new post. So sorry for delays answering any questions. I usually just reply on the same post where you left the comment/question so you can look for that, but you can also just email me directly, my email is there on the sidebar. Or include your email with the comment. As always comments are appreciated - it reminds me that people do actually read my blog!

So anyway, I was at a wedding with a friend recently who noticed my small handmade camera bag. I had made it years ago and it seems a little wonky to me, but she liked it and wanted me to make one for her. She has a typical bulky black leather/vinyl? bag and wanted a smaller one. It was good timing as lately she's been giving me lots of nice old sewing things, vintage transfer patterns, and bags of bias tape, trim, zippers and buttons, so it was a perfect chance to say thank you!

I love when people find old sewing things and ask me if I'd like them. "Are you sure you want this?" "If you don't want this stuff you can just give it to Goodwill.." I love that. They always seem surprised at how thrilled I am.
When I designed the camera bag for my friend I decide it was time to update my own and these are the results. It's a really nice thick soft wool that helps cushion the camera a bit. The colour didn't come out right in the photos and I can't seem to fix it. It's a bit more rich and warm.. Anyway I'm loving this teal blue lately. The floral print was actually a scrap from Jen Anisef leftover at one of the Workroom Trunk shows (thank you Jen!).
The inside is green seersucker. I like seersucker, there's something about it that makes me nostalgic, something comforting about the texture.

Then the outside is embellished with a bit of antique lace from the Sunday Market. I collect these things incessantly so I'm always happy when the right project comes along to use them. I just can't turn down a mason jar full of buttons or a bundle of vintage bias tape or lace.
The overall pattern is modelled on the wristlets I've been making lately with squared bottom corners. The wool is so thick that it was hard to sew with too many layers, so it worked out better having the lining fabric overlap the top to finish it. It kind of looks like a basket liner.

Anyway I now have a camera bag that I love!

Read more...

Wool lace wallet tutorial

>> Monday, February 08, 2010

So this is the new wallet that I mentioned in my last post. I made it from a thick piece of wool fabric and I think that was a nice way to make it sort of soft and cushy without using any interfacing or such. The tricky part was really just figuring out the steps to sew a wallet together.
If you want to make one in this style, just measure the size you would like the wallet to be, ie. the main panel, and decide how many compartments you need to fit the things you need. You'll need to have fairly good sewing skills to follow this, ideally you'll have made similar types of things. Then here are the general steps:

Get started
Create your pattern pieces with paper or cardstock (so you can make another one later!) then cut out the fabric, I recommend linings for the pockets to add structure and give a nice finished look. Embellish the outer panel of the wallet as you wish. I added lace, you could add an inset quilted panel, applique, or anything you like.
Bottom cards section with large slip pocket
1. The card dividers should all be the same height to fit your cards, and the same width as the main panel of the wallet. Attach each to its lining at the top side, turn right side out and press.
2. Attach main slip pocket to its lining, turn right side out and press.
3. Attach card dividers onto main slip pocket. Attach the top divider first, stitching the sides and bottom so that the cards will stay in place with the top of the card showing. Then layer extra dividers on top, each one lower than the last.
4. Stitch a dividing column down the middle.

Top zipper pocket section
1. Create the main slip pocket, sew to its lining, turn right side out and press
2. Sew the zipper to the front of the zipper pocket pieces and its lining
2. Fold in the bottom of the zipper pocket (the outside and lining) and top stitch onto slip pocket.
Closure
1. Sew tab to its lining, at the sides and bottom, turn right side out and press, the tab can be square or rounded
2. Top stitch tab (if you wish) and add a snap
3. Attach the tab to the outer panel of the wallet
4. Add the other half of the snap to the outer panel of the wallet
Finish
1. Attach bottom pocket panel and top zipper pocket panel to the lining
2. Pin the outer panel of the wallet to the lining/pockets with right sides facing in. The tab will be on the inside. Make sure you have it the right way around, ie. the snap is at the top. Stitch all the way around, leaving a gap a few inches wide at the bottom.
3. Trim off the four corners, close to the stitching but careful not to snip too close!
3. Turn right side out and press, slip stitch the gap closed.

I know it sounds like a lot of work but once you work your way through the first one you will know how to do it and can make one to suit you exactly. I love mine so much. I feel much more organized and I've been getting lots of compliments on it. I'm planning to make some to put in my shop soon. So if after reading all those steps you're thinking "there's no way I'm going to sew that", but you still want one like this, you can find one there!

If anyone is interested in a full pattern for this, leave a comment and if there's enough interest I could make one and put it in my shop..

Read more...

Sailboat batts

>> Thursday, January 21, 2010


So here's my next batch of batts. I had trouble coming up with the right colour combination but I love how they turned out in the end. I think I have about 100g.


First of all I had a medium bright blue braid that was a bit dull. Also it was kind of compacted and dense so it was going to be hard to draft. The best solution for this is to divide the roving lengthwise a few times then pre-draft if you need to. But putting compacted fibre through a drum carder will fluff it right back up (you do have to pick it apart a bit).

So I turned that blue braid into the first batt. Then I had a pale minty green braid that I turned into the second batt. I had over-dyed some of the blue with dark brown but when I tried blending the three colours, the results were disappointing.

So I picked a small ball of yellow roving that I had on hand and blended that with the medium blue and pale minty blue batts. Adding yellow to the bright blue was a great way to make it harmonize with the minty (more turquoise) blue. It looks kind of white in the photo... it's just so pale the little tint of colour doesn't show up very well.

The fibre I used for these batts was all merino. I'm starting to be able to tell the difference between fibres. Corriedale  in a braid sometimes feels just as soft as merino. But after putting batches of each through the drum carder I can feel that the merino is softer, and also tends to "cling" a bit more. It's hard to describe but I think it's just that the fibres are more delicate. I find I have to be a bit gentler so as to prevent tangles - just turn the handle of the drum carder more slowly and put less fibre in at a time.


I'm calling this colourway Sailboat. I'm not sure why I keep naming my fibre when I'm planning to spin it myself but I just like to do it...

Read more...

Drum carding

>> Wednesday, January 20, 2010


the original hot pink spun on the left, the new blend on the right

I've now tried and instantly become addicted to drum carding. On Saturday I rented the Louet junior drum carder from Lettuce Knit and so far I've made lots of blended batts and reached the point where I am now rummaging around to find more things to card. It's like that.

Batts resulting from the hot pink blended with dark brown, and the hot pink blended with pale pink

So just to show you how it works, and how fun it is, I'll show you my main project. I had a 1/2 pound bag of very vibrant hot pink corriedale top that was languishing around since I didn't really like the colour anymore. It was just too bright. So I dyed some of it dark purple/brown, then blended that with the original hot pink to soften the colour. Then I blended some of the original hot pink with some very pale pink.

 Then I blended the resulting dark pink and medium pink with more of the pale pink while keeping the stripes fairly distinct.

I find I use the dog brush a lot while drum carding. I use it to remove the batts with gentle short strokes so that little strands aren't left behind. You can also turn it around and use it to burnish the batt as you would with a burnishing brush. It smooths the batt down and you can make a denser batt.

 The resulting batt - rolled up


The batts aren't too wide with the junior drum carder, so I've found the best way to handle the batts once they're done is to draft them out a little bit, then wind them up into a ball. Drafting out a bit helps straighten out any last little bits of fibre that aren't perfectly aligned and makes the batts easy to spin.

Now I have a big basket of rolled up batts ready to spin. And this is the resulting yarn:

I really like the look of it, I guess you would call it a marled yarn. I don't know what I'm going to make with it though. I should be spinning with a project in mind shouldn't I? Oh well I don't really mind having extra handspun around... although I will probably try to find a project so that I can decide the best way to ply the yarn to get the weight and yardage I'll need. But for now I just love carding. And spinning.

Read more...

Dyeing merino

>> Tuesday, January 19, 2010

The last few days have been all about wool. I've done some more dyeing with Kool-Aid. I used four plain white merino 50g braids that I bought at Lettuce Knit recently.

This one is called Koi pond:


This one is called Lilac:

and lastly this one is Rusty Ship, because it reminds me of rust on an old ship:

I did two braids in this colourway (100g) so that I would have enough yarn to finish a project. I can't wait to spin these! After spinning plain brown for so long, it's so fun to be spinning colours again. I just finished spinning this corriedale braid from Kristyn of Pleasurecraft:

into this:

Spinning 2-ply is my favourite now. I think this skein is Sport weight (around 14 WPI).

Today I've been doing some drum carding, I rented the Louet Junior drum carder from Lettuce Knit. I'll show that next!

Read more...

Navajo plying on a spindle

>> Friday, November 20, 2009

In case you hadn't noticed, I'm completely obsessed with spinning right now. It's a shame because I'm already a jack-of-all-trades and I really didn't need yet another craft to keep me busy. But there you go, it's something I can't help.

Anyway, here's something I've just learned. Navajo plying on a spindle! Before I finished the candy cane yarn I posted recently, I had finished spinning a single from the first batch of roving that I dyed with red, pink and green.

I forgot to take a picture of the single. I wish I had because it was incredibly fine. It took days to spin. I actually began to regret spinning it so fine, but decided to finish so I could see how it would turn out.

After reading a comment on my blog about Navajo plying, I looked it up and tried to discover if I could do this on my spindle. Thanks for the suggestion Rachel! I thought this would be a good solution for this yarn because I had spun it so fine that it would have been difficult to wind it in an Andean bracelet and it would have gotten really tangled. (I've learned I could wind it onto a nostepinne, but I don't have one yet.)
So here's what I've learned about Navajo plying on a spindle (with a reminder that I'm hardly an expert at this point):

What is Navajo plying?
Navajo plying is essentially the same as creating a crochet chain, but with long loops. As you pull the loop through, the two strands it creates combine with the original single strand and you spin all 3 to ply them together.

Why bother?
The benefits are that in the end you have a 3-ply yarn that maintains the colour sequence in your single. Also, as with Andean plying, you use every bit of your yarn and don't have to try to divvy up yarn into equally sized balls to ply together.

How do you learn how to do this?
I figured out Navajo plying after watching this video and this one (and a few others) a few times. Then I had to think about exactly how I would do it on my spindle.

My big confusion was about what happens to the "knot" in the chain. The answer is that it is there, but it can hide a bit behind the twist. This is one reason though, why you might want to make longer loops. Longer loops = fewer "knots". However, the length of the loops also affects the way the colours blend together.

Navajo plying on a drop spindle
This how I did it, but of course there are other ways. I decided to try it with parking the spindle and very long loops. It's probably not as fast as short loops without parking but it's a good way to learn.

Get Ready
Wind your single onto a spare spindle, or onto a bobbin, or something that will allow you to draw up the single easily. If you have it on a spare spindle you can hold that between your feet so that the shaft is pointing up and the yarn winds off easily. I don't have a spare spindle or bobbin, so I wound my single onto my niddy noddy and asked my husband to feed it to me. This isn't a long term solution as he is starting to resent spinning. I would like to get some bobbins and a Lazy Kate.

Get Started
1. Create the first loop (a slip knot - like starting a crochet chain) and attach that to your hook. The next loop will be pulled through this loop that has the hook in it. It's awkward but after this you'll be winding plied yarn on to the hook in the usual way with the loop (held open by your thumb) just above.
2. You'll be spinning counter-clockwise to ply. This is assuming of course that you spun your singles clockwise.

Plying steps
1. Park your spindle and draw a new loop through the existing loop. Make the new loop as long as you can. Align the single with the two strands this creates so that you have three strands. Always keep the loop open at the top by keeping your thumb through it. Tip: I found it easier to pull the loop through at a 90 degree angle rather than straight up. There's a risk of breakage, especially with very fine singles.

2. Spin your spindle until the three strands are plied and look the way you'd like them to. You can compare to other pictures of plied yarns, to see the angle of twist that seems right.

3. Wind the plied strand onto your spindle and repeat.

Afterwards
As usual, set the twist by washing your skein in warm water and hanging to dry. A nicely balanced yarn shouldn't need to be weighted to dry.

Read more...

Washing a fleece

>> Thursday, November 19, 2009

The fleece before washing

Ok, so as promised here is the mucky job of washing a fleece (thank you for your comment Melissa!). I have lots to say about this as I've definitely done it the wrong way, and now I think I may have hit upon the right way. For me.

My first fleece was loaned to me by the lovely Marnie. We were chatting at our local farmer's market and I was talking about spinning. It turned out Marnie had a fleece given to her, and hadn't gotten around to working with it yet. So she loaned it to me to try out washing a fleece.

To wash a fleece, you use very hot water, a grease reducing detergent (not soap) such as Dawn (added after the water is poured to reduce bubbles), and be careful not to agitate the fleece or it will felt. Just let the fleece sit in the water and soak. Take it out when the water becomes warm because you don't want it to sit there until the water is cold or it will get shocked when you put it into its next hot water bath.

The goal is to clean out any dirt, bits of twigs and grass, and the lanolin. Sometimes spinners don't clean out the lanolin, and spin directly. This is called spinning "in the grease" and apparently can be very nice on your hands and the finished garment then has a natural water barrier. Very helpful if you're a fisherman off the Isle of Aran, or like to go hiking in a British climate or things like that.
The fleece soaking in the tub

Full of energy, I recklessly decided to wash the entire fleece at once. This is fine, there's really nothing wrong with that, but it is a lot of work. The main issue is that generally a fleece is a very dirty thing. So most websites were recommending washing small amounts at a time so that there's a big proportion of water to fleece.
Filthy water!

What happened is that I put it in my bathtub and every time I soaked it the water was filthy. I think I had to give it at least six baths.
Holding the fleece to one side to drain the tub

And each time I was hanging over the tub sort of holding the fleece out of the way while the tub drained and pulling wool out of the drain guard again and again then swishing the tub clean and then refilling the tub and I ended up hurting my back. I could barely walk the next day.
One of the lovely clean locks

Anyway, once the fleece seemed to be reasonably clean, I laid it out to dry and that took days. Lots of days. Mainly because I didn't have room to really spread it out, so it was in a big heap on a towel on the floor. Until finally we had a reasonable sunny day and I put it outside to dry. This fleece is now in a big bag but the staple length (length of the locks) is quite short so I think I will need some carders before I can get it ready to spin.

So the right way, as you have probably guessed by now, is to wash your fleece a little bit at a time. I sorted my fleece by colour, light grey, medium grey, dark grey and brown/black. Then stored each in a separate bag. So now I'm working my way through the first bag. I've done one small batch (in the sink, standing up!) and it just took 3 soaks. Then I drained it and put it on a towel on a drying rack to dry. Washing should keep the locks intact. I separated the locks out on the towel and the next morning they felt pretty dry. It's best that they're not bone dry anyway so that if you prepare them with a flick brush there's less static.

I'll show you how I'm preparing my locks in another post...

Read more...

Christmas candy 2 ply

>> Tuesday, November 17, 2009

Before I show you the mucky job of cleaning fleece, here are some prettier pictures of another finished skein. This one started out with the "apple tree" roving.
If you're learning to spin and finding the drafting difficult the best tip is to pre-draft your roving. Gently pull at the roving until it's thinned out as evenly as you can. When roving is drafted out very thin it's called "pencil roving". After drafting I wind the roving back up into a big soft ball and it's lovely to work from when it's prepared this way.
The picture above shows how the single looked. The colours are mainly distinct, with a small amount of candy caning here and there. This is when you have two different colours of roving that you spin together. I like the way this looks so I purposely let it happen.

After spinning the singles I plied on the drop spindle using an Andean bracelet. At this stage the spindle can get really full. The spindle will still work but the yarn can sometimes slip down a bit. I wind a bit of painter's tape at the bottom of the shaft to keep the yarn secure.

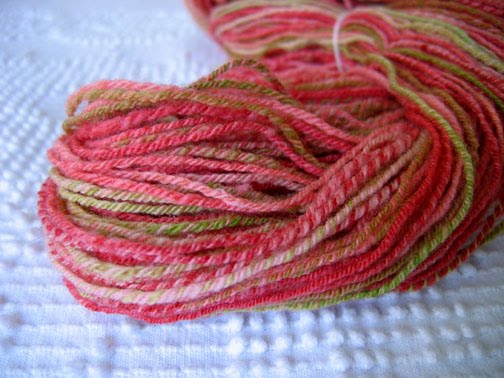
After plying all the colours blended with mixes of red, white and green and I realized that it was starting to look a bit like Christmas candy.
This is the finished skein. This yarn is also in my shop, mainly because while I love the yarn, right now I'm all about the spinning.

Read more...

  © Blogger template Simple n' Sweet by Ourblogtemplates.com 2009

Back to TOP