Showing posts with label spinning. Show all posts

Tour de Fleece - sort of

>> Thursday, July 29, 2010

In June we were watching the FIFA World Cup. Bradley was waking up early every morning to watch it before going to work. Then that was overlapped with the beginning of the Tour de France and he started watching that every morning. Now that it's over I kind of miss it. How likeable is Andy Schleck??

So I had heard about the Tour de Fleece but never participated. If you Google it you'll find lots of blogs with spinning posts. It's just like the Knitting Olympics but for spinning. You set yourself a spinning goal and spin while the Tour de France is on.

This year I unofficially joined up with the goal to finish up a few spinning projects. I had little bundles of spindles with partly spun roving stashed all over the house. So now I can show you some more of my finished yarn!

I've decided that with all the work I was doing spinning fine (and trying to be even) singles, I would try keeping more of my yarn as singles. I like having thinner yarn and more yardage. A single isn't as strong as plied yarn but depending on what you're making it can be fine. And they're so pretty!
The first skein I finished was a silvery grey corriedale that was part of my birthday present from Bradley. It's a nice fat skein, kept as a single ply with just a wash to set the twist. (When yarn is freshly spun the twist is still "active" so setting the twist means finishing the yarn so that it's ready to be knit or crocheted.)

I can't remember if I've explained how I set the twist, but all I do is wind the yarn onto a pair of purse handles and soak it for a while in warm water. I add a little bit of hand soap (Body Shop Satsuma) just so it smells nice. This also washes the yarn a bit extra in case the fleece wasn't perfectly clean beforehand. Then I rinse the wool, gently squeeze (not wring) out the excess water, whack the skein against the side of the sink - just a couple of times - then hang the yarn to dry. I put a light washcloth inside the loop of yarn so that it doesn't tangle and I find it helps absorb some of the water so that it dries faster. If the weather is nice I hang the skein in our backyard - a skein dried in the open air has a lovely fresh smell.
The second skein I finished was the Rusty Ship merino that I dyed myself. I had spun half of it already and it was sitting on a bobbin. I love how this one turned out. Keeping the singles makes the colours more distinct, with just a little subtle candy-caning (ie. two colours twisted together for a candy cane stripe effect).

Here's a detail:
Then lastly, I finished a nice rich brown Shetland from Lettuce Knit. I love Shetland, it's lovely to spin and the finished yarn is soft and cushiony.
It feels good to get some WIPs all finished. Also I like having some nice skeins ready for the fall when I'll start to feel like making some new winter knits.
But today was not all good, someone took a big bite out of our first homegrown tomato! Bradley planted peas, carrots and beets this year, and I planted some already started tomato plants from our local market and a herb garden. Everything seems really slow to grow, and we finally had one of the tomatos turn a little bit orange.. and just as I was thinking I should probably bring it in, there it was this morning with a big bite! Boo.

Read more...

Spinning singles

>> Tuesday, April 20, 2010

I haven't posted about spinning in a bit so I thought I'd show some recent projects. I finished spinning the Koi Pond roving and was quite pleased with the results. When you dye roving in patches it's sometimes hard to predict how the finished yarn will turn out.

The main difference with spinning singles is that you're meant to spin with a little less twist. I also spun it a little bit thick and thin which is something you have to relearn after you've been spinning a while. You tend to get into a habit of spinning a certain way and I've been practising spinning thinner and more even yarn.

My next project is a beautiful blue and green merino braid from Freckleface Fibers on Etsy. It arrived like this:
Then I pulled it apart and wound it into balls like this:
And now I'm spinning it up!
It's so much fun spinning colourful braids like this, the colours shift as you go and you never get bored. Here's a detail:
Then yesterday was my birthday and one of my treats from Bradley was a surprise visit to a fibre shop he discovered. It's in Mt. Albert and it's called Gemini Fibres. I picked out lots of treats including a lovely new spindle made from white maple:
I also made up my own fibre sampler with lots of types of wool I haven't tried spinning before such as Falkland, Finn, Blue Faced Leicester (BFL) and Alpaca in beautiful natural colours. I can't wait to try each one!

Read more...

Purple plum spiral handspun yarn

>> Monday, January 25, 2010


This is a yarn I made a little while ago. I had to hold onto it for a bit but it's up for sale in my shop now. I spun it with some roving that was included with the spindle (pictured above). I wish I knew what the fibre was, because it was lovely to spin. I dyed it with a variety of purples then pre-drafted it into a nice soft big ball of roving:

This is the finished single:

Just to make it come out even I Andean plied it:

I know it looks a little crazy and maybe Andean plying is meant for smaller amounts of yarn. I do like plying with bobbins (I'm going to show how I do that soon), if I have enough yarn, but sometimes when there's just 2 ounces or so I'd rather Andean ply and not worry about having leftover singles. I find it works really well, as long as the single isn't too fine, which can cause tangles.

One new technique I tried while plying was adding little coils/spirals into the yarn by pushing one strand up while the other strand is held in place. Here's a close up so you can see the spirals:
 
The final effect was subtle, but I thought it turned out well, quite pretty.

Read more...

Men's handspun socks

>> Thursday, January 14, 2010


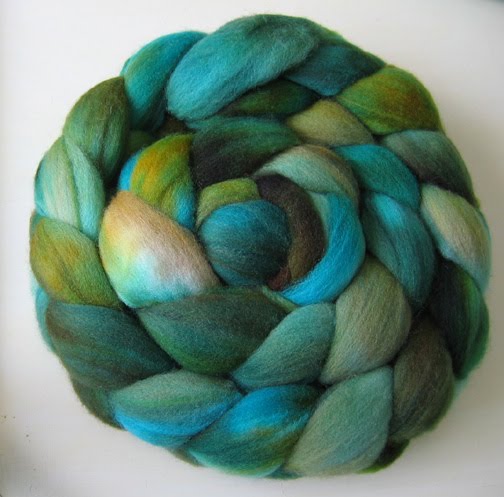
So as I mentioned before, I was frantically spinning before the holidays to make Bradley some handspun, handknit socks for Christmas. I had bought a 1/2 pound bag of roving from Romni, thinking that I would have plenty for maybe 2 pairs. Or at least a pair for him and a smaller pair for me. Or something like that.

Anyway what happened is it took forever to spin a 1/2 pound bag, and I ended up with just one pair of socks and a tiny batch of roving and a tiny ball of yarn left over. The big thing I learned is that I bought a bag of roving, and realized later that it was actually roving, not the lovely smooth combed top that is often sold as roving even though it's really top. I'd heard about this distinction but I didn't really know what it meant until I tried spinning with the roving.

The difference seemed to be that the fibres were shorter, with some tufty bits that were fine as it gave the yarn a tweedy look, but also lots and lots of vegetable matter (vm). In case you don't spin, this is basically little bits of dried grass, twigs and bits of burrs that the animals have gotten caught up in their coats. Some people put covers on their sheep to avoid this, but there's still always some in there. Anyway I was picking out vm while spinning, then while winding onto bobbins, then while plying, then while knitting, then after washing the socks. Kind of tiresome.

However, I'm not complaining about what I was sold, because I did get 1/2 pound of merino for only $15. Which is a very good price for that much soft merino. And now I fully appreciate the difference between roving and top.

The other thing I learned is that this roving seemed to require a different kind of spinning. The short fibres didn't hold together in the same way so I was letting twist up into the fibre source which is more of a woolen method of spinning than worsted. (Worsted is a way of spinning so that the fibres align and it creates a smooth yarn. With woolen spinning the fibres criss-cross and this creates a fuzzier, airy yarn that is very warm. Not to be confused with worsted weight yarn, which is a medium thickness of yarn.)

After letting twist up into the fibre, it was like pulling the yarn out, and by doing it at the right rate given how fast the spindle is spinning, you can make an evenly spun yarn. I found it a bit lumpy but I ended up doing a 3-ply so it averaged out a bit and was fine. 3-ply also creates a rounder looking yarn, as opposed to the beaded look of a 2-ply.

So doing a (non-navajo) 3-ply was the next new thing I was trying. I wound the yarn onto bobbins after spinning a full spindle, then used a tip from a commenter (thank you Rachel) to create a lazy kate using a cardboard box and some knitting needles. (Another tip is that you can just ply off spindles if you have enough of them to do that.)

Then I plied the yarn until I was left with some leftover singles (it's hard to wind 3 bobbins of singles and have them come out even). I realized I could wind a leftover single back onto the spindle and spin a bit more. And basically drive myself crazy trying to make it come out even. Which in the end I practically did. Not that I recommend being that obsessive it... suffice to say I was winding back and forth several times.

So after all this spinning (and washing and drying the yarn) I wanted to make the socks using the same nice sock pattern I had used for mine (pictured at the top on the left). This is how I adapted the pattern for men's socks:
  • Larger needle: US size 7 
  • worked 15 rounds of ribbing instead of 10
  • continued leg in stockinette for 45 rounds instead of 36
  • at the toe decrease once there were 8/8/10 stitches stopped doing the all knit rounds
  • grafted the toe at 5/5/10 stitches
You can vary these adaptations to fit any specific man's foot, ie. adjust the length of the sock, the length of the foot and how quickly you decrease at the end. Thank you for such a great simple sock pattern Kit Zerbe!

As with my socks, knit with lambspride worsted yarn, after a wash in the washing machine, they felt a tiny bit which improves them a lot. They end up snugger, denser and warmer.

And believe it or not it was worth all the work, Bradley loves his socks so much. They fit perfectly and are apparently the warmest socks ever.

Read more...

Lily spindle

>> Wednesday, December 30, 2009

The Christmas holidays have been great, lots of rushing around and family events. I'm not going to leave my shopping so late next year. Really. Anyway after everything it's been so nice to have a few sleepy days with Bradley still off work. He's been knitting his first sweater.

I've been working on a few crafts projects including finishing the yarn I was making for Bradley to use to knit him some warm socks. I didn't manage to finish it in time for Christmas. He's been reproachfully walking around in bare feet. But the yarn is all spun now! I'll post that soon.

Pictured here is one of my new favourite treats, a Lily Spindle I bought some time ago which arrived just before Christmas. I couldn't wait to do a little spinning with it so I've been using some of the fibre I got from Kristyn (Pleasurecraft) at City of Craft.
Here's a close up picture of the top, it has lovely detail and the scallop flower shape is perfect for holding the yarn in place. I also love the open style of the hook. It's made of olive wood from the pruning of the trees planted by the Romans 2000 years ago. They still produce olives and Gilbert Gonsalves purchases the prunings with no damage to the trees.

This one is 3/4 ounce which is for lace weight and a little bulkier. I'm still working out how to choose the weight of spindle to use (and which weight to spin) for various fibres. Generally I've just been trying out lots of things.

For example, this fibre is Cheviot. It's crimpy and springy. I'm guessing that spinning it this fine isn't what you would usually do, but it's turning out really nicely. It feels softer when spun for some reason. I also think the spindle is a bit lighter than you might normally use for this type of fibre, but I couldn't wait to try it.
The fibre is a pretty robin's egg blue, an icy blue, and I think it will be perfect for our new tea cosy!

Read more...

Homemade spindles

>> Thursday, December 03, 2009

I forgot to mention, these beautiful knitting needles are from The Purple Purl, my new local knitting shop

As you know, I'm now a little spinning obsessed. I've bought a couple of spindles, because I love what they can do, and there are so many beautiful ones out there, plus it's a bit like knitting, you need extra ones so you can have more than one project on the go.

But I wanted more, and decided to figure out how I could make one myself. There's a few tutorials online, such as a cd spindle (just Google it for examples), this one made from a cardboard circle and a pencil, or even a potato on a stick. This is a good way to learn so that you can decide if you like spinning before you invest too much money. (If this has already happened feel free to mail me any spindles you don't want anymore. Just kidding. Sort of.)

My favourite idea is a drop spindle made from a wooden knob. Abby Franquemont's video Drop Spindle Basics shows you how to learn to spin with a low whorl drop spindle that is just a drawer pull (wooden knob) attached to a dowel.

I wanted to make one that was a little bit fancier, functional and even nice looking, while still not requiring any real woodworking skills. The results were better than I expected, and these handmade spindles work really well! The big trick was to use carved wooden knitting needles which added a nice decorative detail to the top and a smooth polished surface that tapers. But of course a piece of dowel is fine too.

Step 1:
Assemble your supplies. I used wooden knitting needles, vintage wooden knobs (in a variety of weights) from an antique store, a power drill, a scrap block of wood, hooks, pliers and wood glue.Step 2:
Use the pliers to open up the hooks. These ones have a triangular shape so that the yarn stays in place a bit better than a round hook.
Step 3:
Place the wooden knob on the piece of scrap wood so that you protect the work surface when you drill right through the knob. Make sure you drill right through the centre.Step 4:
Add wood glue to the top of the knitting needle (or dowel). Place the knob on the needle or dowel and let the glue dry.Wood glue starts out white but will dry clear:Step 5:
Drill a tiny pilot hole in the top of your knitting needle (or dowel). Use the smallest drill bit you have. Screw in the eyelet.
Extra options:
If you like you can saw a notch in the side of your whorl.

These are two of my finished spindles. They work beautifully!

Read more...

I get it now - spinning again

>> Friday, October 30, 2009

My fascination with spinning continues... and as you can see I have a beautiful new spindle. I'm going to post about those soon.

One last note about the Kool-Aid dyeing. Afterwards your roving will look a bit sad, you may have squeezed it to get the water out and then hung it up and it will have that drenched kitten look. All the fluffiness will be gone and you may worry that you accidentally felted it.
You may pick at it and stretch it in an effort to see if you turned that lovely fluffy merino roving into a big fat piece of rope. My advice to you is to wait. Let it dry and it will be all fluffy again in the morning.
I even learned how to braid the roving (this funny tutorial) and now it's looking its best again. Well a wee bit fuzzy but it seems to still draft easily. I'm calling this colourway Apple Tree because it has a range of apple red, pale pink and green. My other strand of roving has the same colours plus a tiny hint of blue which makes me think of picking apples on a sunny day with a bright blue sky.
For ages I've seen dyed roving in yarn stores and not really seen the appeal. But what I know now after learning to spin is that it's so amazing how those patchy colours turn into pretty strands of colour that change again when you ply them. I'm not sure what I'll be left with in the end, but I love the process.

Read more...

Green yarn done!

>> Wednesday, October 28, 2009

I am so proud of this yarn I can't tell you

Thanks so much for the comments in my last post. I took your advice Amberlee, and decided I should ply my green yarn after all. I loved the way it looked before, and the delicate weight, but am resigned to the fact that it wouldn't make socks that would last. Now that the yarn is plied it's worsted weight so the socks will be nice and warm. The colours have blended to create an overall greenness.
Now I need a niddy noddy so I can make skeins without my husband's hands

Anna's comment led me to her beautiful blog, wildflowers::pretty which coincidentally had a post with a nice simple sock pattern for worsted weight yarn. At the bottom of the post there are some handy links for anyone new to sock knitting. I love the nice simple brown socks she made. So I think that's the pattern I'll start with and see how it goes.

p.s. I found errata for this sock pattern on Ravelry posted by jeaniesmith. Become my Ravelry friend: my name is needlebook!

Read more...

More spinning

>> Monday, October 26, 2009

I was right, spinning has proven to be very addictive. This is my first ball of yarn. In case anyone is wondering, I did the whole first skein using "park and draft". I tried spinning and drafting at the same time and just couldn't manage it.

Near the end I was starting to think I could but I didn't want to mess up my first skein by trying to move beyond park and draft. This first ball of yarn is quite thick, mainly because when I started that's all I could do, but also I wanted to keep it consistent so by the end I was trying to make it thick to match.

For my second ball, I did spin the roving into a thinner yarn and started to spin without having to park the spindle all the time. Anytime I had trouble drafting I'd park it to catch up. I had a small piece of pink roving and a small piece of orange, so I spun them up so that I could try plying.
This is what I ended up with:
One reason to ply is to create thicker yarn. It can also strengthen the yarn, and even out thicker and thinner areas. But my favourite reason is that it balances out the yarn so that it sets the twist for you. No need to soak and wait for your yarn to dry in order to set the twist.

I loved plying because it goes a lot faster than spinning. It's quite satisfying. All you do is spin your drop spindle in the opposite direction (ie. spin clockwise, ply counter-clockwise). Once you've done a length, you can let it hang down and if it stays in a smooth "U" it's perfect. If it twists up on itself you can add or decrease the amount of twist until it suits you.

Next I used a large piece of orange/brown/purple dyed roving to practise spinning without parking the spindle. I really have the hang of it now. It helped to pre-draft the roving by pulling it gently into thinner strands. I also learned to gently wind the roving around my wrist to keep it out of the way while spinning.Then I used a youtube video to learn how to wrap the yarn into an Andean bracelet. This is a way to wind the yarn so that you can pull from both ends and ply together until every bit is used. This way you don't have to try dividing your yarn into two equal parts before plying.

This is how that yarn turned out:
My latest spinning project is using a larger amount of roving (almost 4 ounces) of green/brown/blue roving:
I should have enough to knit some socks with it. I love wool socks and they can be expensive so it's a good way to practise spinning while creating something I'd actually really like to have. This roving made such pretty yarn, with strands of green and brown and blue:
I'm not sure whether or not to ply this yarn. I like the way it looks now, so I suspect not. Right now if I wind it around a ruler it comes out to about 22 wraps per inch (WPI) which is lace weight according to charts I've found online. Now I just have to find the perfect sock pattern!

Read more...

Making yarn

>> Tuesday, October 20, 2009

Thank you to everyone who came to the Rummage Show at the Workroom. I had a great time with lots of fun chatting and a bit of swapping. I did manage to sell lots of things and so it was a big success for me as I went home with a lot less than I brought even though I picked up lots of nice new craft supplies.

Lately as the weather gets cooler I've been turning to the woolier crafts and my new interest is hand spinning. I had bought a drop spindle at a craft show but couldn't manage to spin with it. I picked it up again the other day and realized I should try Youtube for some more tips. I found a great tutorial by the spinning guru Abby Franquemont and that made all the difference.

The big tip is to begin by trying the "park and draft" technique. This means that you can "build up twist" in your yarn by spinning the spindle, then hold it between your knees so that it doesn't have a chance to spin backwards, then take your time "drafting" your roving.

Drafting means pulling gently at the roving to thin it out to create the thickness of the yarn you want. It can take time to learn how to do this while keeping the spindle spinning, so "parking" the spindle gives you as much time as you want. While the yarn is building up twist you pinch it so that the twist doesn't travel up into your roving until you've finished drafting.

I finally finished my first skein of yarn! The picture at the top of this post is the yarn wound up on the spindle. The picture below is the yarn transferred to a pair of wooden purse handles. I just had them lying around (they were up for offer at the Rummage Show and didn't sell, so that was lucky). The main object is to keep the tension in the yarn so that it doesn't get all twisty.Then I "set the twist" by soaking the yarn for 10 minutes in hot water. After that I took the yarn off the handles thinking that it might dry quicker. But this was a mistake as the twists showed up again and the whole ball got all kinked up:So I carefully wound the yarn back onto the handles to dry:Seems ok now! It seems this stage is akin to blocking a hand knit sweater.

Lastly, I am no expert with hand spinning. The whole thing is new to me. So if you'd like to read along as I learn how please do, but turn to the experts if you want information you can rely on! More experienced spinners are welcome to leave comments telling me what I'm doing wrong as I'm keen to learn. And then other people can benefit from your expertise too. And one warning to those of you who would like to try this: I suspect it will become quite addictive...

Read more...

  © Blogger template Simple n' Sweet by Ourblogtemplates.com 2009

Back to TOP