Fat Quarter Bag
>> Tuesday, September 09, 2008
 It's amazing what you can do with a fat quarter. I was thrilled when Karyn starting a shelf of fat quarters at the workroom because it's a great way to pick up usefully-sized pieces of fabrics that you're coveting without investing too much. Although if you get, like, twenty, it can add up. But that's between you and your fabric addiction. (And Karyn, who is very understanding.) p.s. I keep going on about the workroom.. here's a post that has some great pics.
I finally found a project for this fat quarter, it's barkcloth with an oddly pleasing mix of colours: green, lavendar and tan. The bits where the green overlap the purple make a nice olive green too. I wasn't sure about it when I first saw it but now I love it.
The other benefit of the fat quarter is you don't have to think too much about what you can make because you're limited by the piece you have. So you don't have to worry about cutting into a nice big 3-yard piece of fabric, if you know what I mean. My secret joy is to use every little scrap of the piece and end up with something I like and nothing left over.
In this case I decided to just wing it and make a bag in this style about as large as I could using my square of fabric. I'd seen similar bags in shops and thought I could figure it out as I went along.
I folded the square of fabric in half and cut a long strip about a foot wide for the front and back of the bag all in one. Then I cut two panels for the top of the bag and two side panels. The side panels add more width to the bag and some shaping.
 Don't be afraid of your vintage Singer buttonholer attachment, they look big and complicated but they're one of the easiest extras to use. Way easier than the hemming foot. Of course if you have a modern machine that does buttonholes automatically, nevermind.
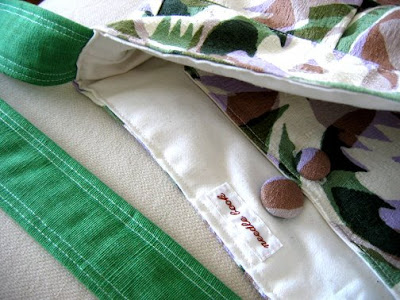
 After making the top and side panels there was a large remaining square of fabric that became the inner pocket (lined with white), and two small squares which I made into a little matching coin pouch (also lined with white).
 Then I was left with one tiny scrap of fabric... which I used to make covered buttons, one for the outside and one for the inside pocket.
Of course I didn't have enough for the strap, so I used a green piece from my stash, that luckily was sort of cross-woven with tan threads so it matches really well. It took most of a day, but this is now my new favourite bag.


4 comments:
Ah that looks lovely!
Love the barkcloth colors! Nice job!
That is a great bag! I love it.
I love it! Such a clever construction and a great Autumn feel.
I would love to go to The Workroom! I read Karyn's blog, it's one of my favourites. Unfortunately Portugal is a bit far away...
Post a Comment