Navajo plying on a spindle
>> Friday, November 20, 2009
 In case you hadn't noticed, I'm completely obsessed with spinning right now. It's a shame because I'm already a jack-of-all-trades and I really didn't need yet another craft to keep me busy. But there you go, it's something I can't help.
Anyway, here's something I've just learned. Navajo plying on a spindle! Before I finished the candy cane yarn I posted recently, I had finished spinning a single from the first batch of roving that I dyed with red, pink and green.
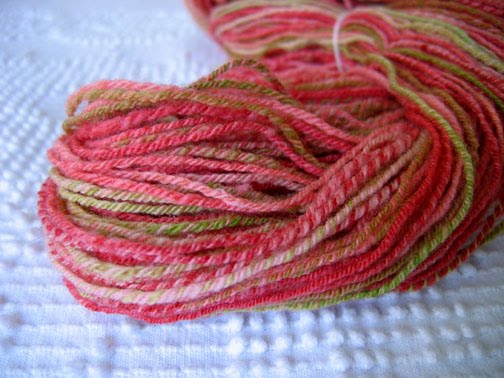 I forgot to take a picture of the single. I wish I had because it was incredibly fine. It took days to spin. I actually began to regret spinning it so fine, but decided to finish so I could see how it would turn out.
After reading a comment on my blog about Navajo plying, I looked it up and tried to discover if I could do this on my spindle. Thanks for the suggestion Rachel! I thought this would be a good solution for this yarn because I had spun it so fine that it would have been difficult to wind it in an Andean bracelet and it would have gotten really tangled. (I've learned I could wind it onto a nostepinne, but I don't have one yet.)
 So here's what I've learned about Navajo plying on a spindle (with a reminder that I'm hardly an expert at this point):
What is Navajo plying?
Navajo plying is essentially the same as creating a crochet chain, but with long loops. As you pull the loop through, the two strands it creates combine with the original single strand and you spin all 3 to ply them together.
Why bother?
The benefits are that in the end you have a 3-ply yarn that maintains the colour sequence in your single. Also, as with Andean plying, you use every bit of your yarn and don't have to try to divvy up yarn into equally sized balls to ply together.
How do you learn how to do this?
I figured out Navajo plying after watching this video and this one (and a few others) a few times. Then I had to think about exactly how I would do it on my spindle.
My big confusion was about what happens to the "knot" in the chain. The answer is that it is there, but it can hide a bit behind the twist. This is one reason though, why you might want to make longer loops. Longer loops = fewer "knots". However, the length of the loops also affects the way the colours blend together.
Navajo plying on a drop spindle
This how I did it, but of course there are other ways. I decided to try it with parking the spindle and very long loops. It's probably not as fast as short loops without parking but it's a good way to learn.
Get Ready
Wind your single onto a spare spindle, or onto a bobbin, or something that will allow you to draw up the single easily. If you have it on a spare spindle you can hold that between your feet so that the shaft is pointing up and the yarn winds off easily. I don't have a spare spindle or bobbin, so I wound my single onto my niddy noddy and asked my husband to feed it to me. This isn't a long term solution as he is starting to resent spinning. I would like to get some bobbins and a Lazy Kate.
Get Started
1. Create the first loop (a slip knot - like starting a crochet chain) and attach that to your hook. The next loop will be pulled through this loop that has the hook in it. It's awkward but after this you'll be winding plied yarn on to the hook in the usual way with the loop (held open by your thumb) just above.
2. You'll be spinning counter-clockwise to ply. This is assuming of course that you spun your singles clockwise.
Plying steps
1. Park your spindle and draw a new loop through the existing loop. Make the new loop as long as you can. Align the single with the two strands this creates so that you have three strands. Always keep the loop open at the top by keeping your thumb through it. Tip: I found it easier to pull the loop through at a 90 degree angle rather than straight up. There's a risk of breakage, especially with very fine singles.
2. Spin your spindle until the three strands are plied and look the way you'd like them to. You can compare to other pictures of plied yarns, to see the angle of twist that seems right.
3. Wind the plied strand onto your spindle and repeat.
Afterwards
As usual, set the twist by washing your skein in warm water and hanging to dry. A nicely balanced yarn shouldn't need to be weighted to dry.


3 comments:
Couple ideas for homemade lazy kates -
http://www.flickr.com/photos/89546210@N00/1552290770/
and
http://www.keyboardbiologist.net/knitblog/2006/08/building-a-home.html
I have slid the cop from the spindle to a knitting needle and plied off of that. Depending on the size of the cop you might be able to do 2 on one knitting needle.
congrats on your 1st N-ply!
Your handspun is just lovely! Thanks for the explanation as well.
Post a Comment