 I finally tried the Clapotis pattern from knitty.com. I guess I liked the picture and the description sounded really great - I was caught up in that whole Je suis belle et ça ne demande aucun effort thing. And I had two skeins of red and pink Cascade Quatro that I thought would be perfect. I like yarn with different strands of colours, but I don't always know what to make with it. Although this is the kind of pattern that will show off multi-coloured yarn I'm just not that into the pattern anymore...I think now that I've tried it I would like it better in something much finer and softer like a kid mohair.
Now that I've worked it out, I thought I could at least offer some tips to others trying it. The pattern looks complicated but if you take your time and just trust the pattern it's not that difficult. But I did work out a little trick that may help with the 2nd section which can be tricky. As you know if you've tried this pattern it can be hard to unravel mistakes and figure out where you are. So this helps with that. Because if you forget just one k2tog or yo it can be hard to fix. My idea was that the 6-stitch repeats are always the same, so you really just need to keep track of the number of stitches before the first and after the last marker. With the chart you can at least figure out which row you're on just by counting the stitches before the first and after the last marker. And you know right away if you've made a mistake.
Here's the chart I worked out.
Row Beginning (before 1st marker) End (after last marker)
Purl row 1 6 stitches 5 stitches (becomes 4)
Knit row 2 4 stitches 6 stitches (becomes 7)
Purl row 3 7 stitches 4 stitches (becomes 3)
Knit row 4 3 stitches 7 stitches (becomes 8)
Purl row 5 8 stitches 3 stitches (becomes 2)
Knit row 6 2 stitches 8 stitches (becomes 3)
Purl row 7 3 stitches 2 stitches (becomes 1)
Knit row 8 1 stitches 3 stitches (becomes 4)
Purl row 9 4 stitches 7 stitches (becomes 6)
Knit row 10 6 stitches 4 stitches (becomes 5)
Purl row 11 5 stitches 6 stitches (becomes 5)
Knit row 12 5 stitches 5 stitches (becomes 6)
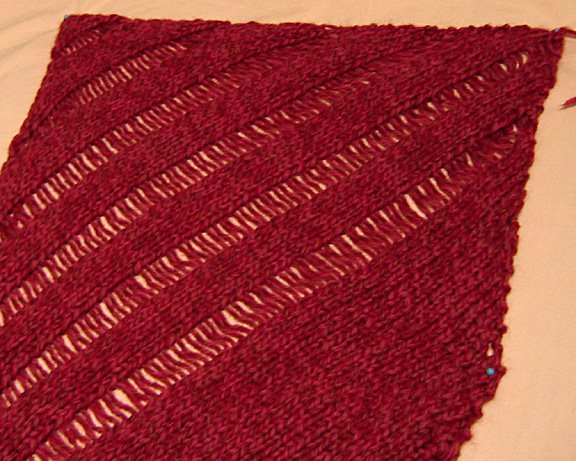
Here's a close up of mine - I did fewer repeats to make mine smaller since I only had two 100-gram skeins. I pinned the scarf down for the picture because of course it curls up a lot and would need to be blocked.
 Here it is even closer - I think I'm going to unravel it now - I just don't like it that much. I think it's a great pattern but the yarn is a bit thick and not very soft. At least I finally know what everyone is talking about!
No comments:
Post a Comment
Thank you for your comments!