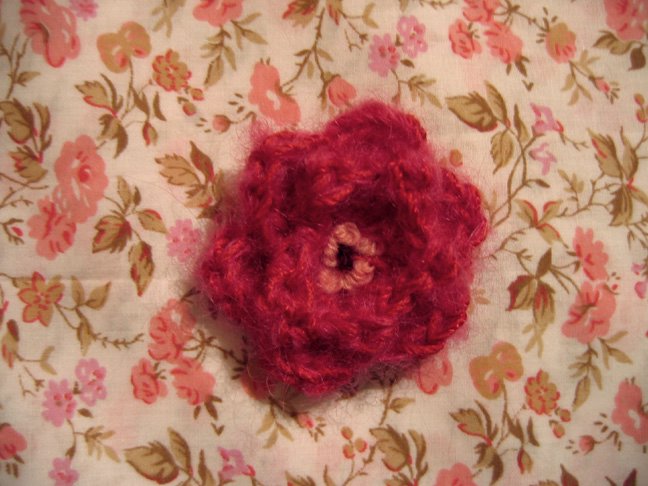
 I made a couple of these crochet flower brooches over the past two days. They were inspired by the Flickr Color-iffic swaporama which I'm participating in this month. This is the package I made for my secret partner. The theme for February's swap is pink and red, so I combined a pink mohair yarn with a red cotton yarn to make the flower. The centre is pale pink French knots, with a dark purple French knot in the centre. I'm going to add these to my etsy shop: clairelmilne.etsy.com
 I also finally fixed a crochet belt I had which had stretched too much. It wasn't lined and it tied with a knot and it just kept getting longer. Partly because it was made with a stretchy ribbon yarn and partly because of the crochet stitch itself being stretchy. So anyway I can't tell you which yarns I used, because although I carefully save all my yarn labels I can't always remember which one goes with which. When I'm being really clever I staple a little piece of the yarn to the label before saving it.
But here is how you would do it with anything you happen to have around the house:
1. Make a little swatch to figure out how many stitches would make a belt of the right width to go through the belt loops. This one was 7 stitches wide with a G size hook. When you start out leave a tail of yarn to use to sew the belt to the d-rings.
2. Crochet until the belt is around 3 inches longer than your waist (or longer if you want to tuck the end back into one of the loops). For the pink belt I used single crochet throughout, and for the turquoise belt I did a row of single crochet alternating with rows of double crochet. And of course you can do fancier stitches if you're more experienced.
3. Taper off a bit to make the curved end part. I just decreased by one single crochet stitch on either side. More specifically, skip the first stitch, and do the last stitch as a slip stitch not single crochet. If you skip the last stitch altogether you will get a bumpy decrease. (Maybe more experienced crocheters know a better way, so you can do whatever you like. You could even leave it straight at the end, but I find the corners start to curl.)
4. You can buy d-rings for the belt at most sewing stores. You sew both rings to the starting end of your belt by looping a small part of the belt through the rings over the straight part and sewing it down with a leftover bit of the yarn.
5. For the lining, cut a strip of fabric a bit wider than the belt, fold under both sides, pin and sew it onto the belt.
p.s. if anyone is wondering if people ever make my patterns (I was) have a look at this!
p.p.s. I've posted some fabric for swapping on Flickr.
They're both gorgeous: love the colours!!
ReplyDelete