Wedding Day!

>> Sunday, September 17, 2006

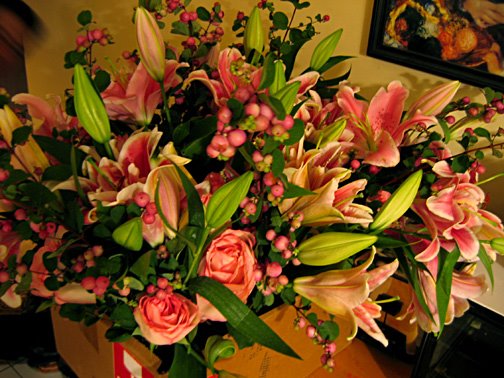
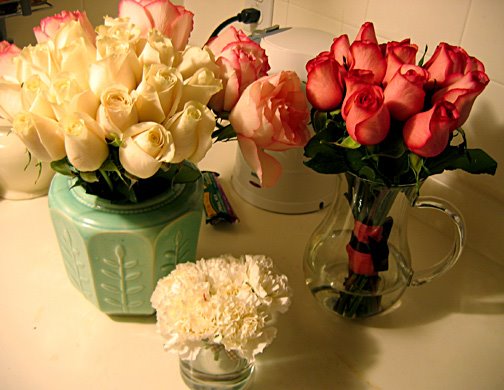
It's our wedding day today! I'm up early after tossing and turning last night...I had to get up and make a list of all the little things I wanted to remember. I finished the flowers last night, my bouquet is creamy white roses, the pale pink are extras for flower girl petals. The bridesmaid bouquet is dark pink roses. It was so much fun choosing flowers yesterday!

We found lovely pink snow berries to add to the vases.
And finally, one of the boutonnieres:
Thank you so much everyone for all your best wishes for our wedding, see you when we return!

Read more...

Speaking of flowers...

>> Wednesday, September 13, 2006

That's right, I'm going to breeze in and post as if I haven't been neglecting needle book. I finished my graphic design contract on Monday and I'm starting to catch up with everything. Our home is starting to look a little more organized! I'm also doing lots of wedding crafts which I wish I could show you but I want to keep most of them as surprises.

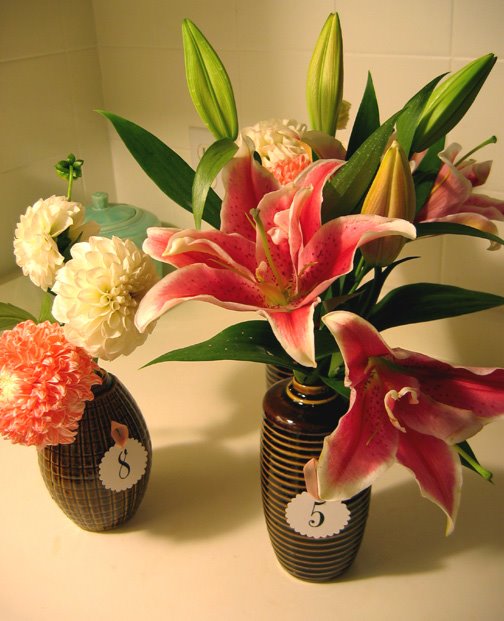
Today I made some paper mats to go under our vases in the centre of each table. We found nice ceramic vases at IKEA a long time ago and thought we might as well get them. It's one of many things we're so glad we did do at the time because the wedding date is now coming up so fast. I can't believe it's this Sunday, I keep feeling there must be an extra weekend in there somewhere.
I had a great time today flower shopping. There are a group of four flowers shops on Avenue Road just south of Davenport and I've always loved them but rarely get up there. But they're perfect for the wedding flowers because they are all just full of rows and rows of beautiful, fresh, inexpensive flowers. I noticed to my delight that most of the flowers are arranged nicely in bouquets already. For example, they have pretty roses already arranged to form a dome with the thorns trimmed. I'm tempted to consider roses now for the bouquets because they were so nice - white roses would be really elegant, but the white ones tinged with pink may be my favourites. The shops also have buckets with large leaves that you can buy individually, so I can frame my bouquet with leaves.
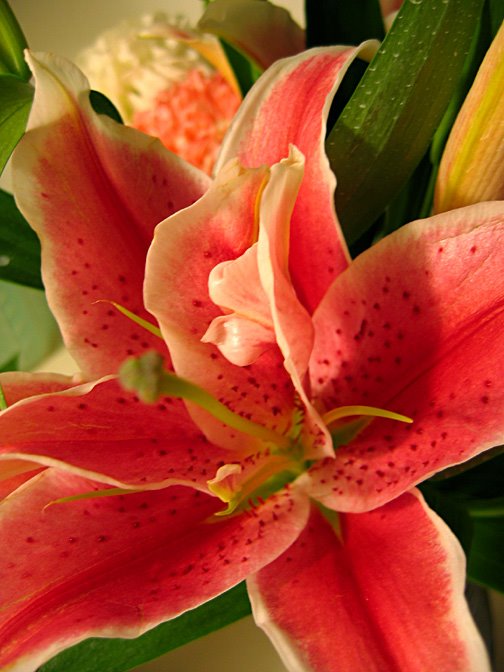
I picked up some flowers to try out for the table decorations. The tiger lilies are my favourite because they also have a wonderful scent. Now I have to go finish working on the seating chart...p.s. Thanks for your comments Heather, as always! I love the green jar too, I think it's vintage and it's probably meant for cookies but right now we have granola bars in it. I put a measuring cup in the background so you can see how large it is.

Read more...

Bouquets

>> Sunday, September 03, 2006

Today was another day to do odds and ends to get ready for the wedding. It's in TWO WEEKS! It's starting to seem very very soon. We were very happy with our idea for favours. Three people today asked me what favours are (although to be fair one of them was my four-year-old niece) so I will just mention that they are the little chocolates or suchlike that you take away with you as a treat/thank you/memento. Much like the loot bag but of course more weddingish and elegant. I spent most of the afternoon assembling the favours, printing out labels and writing people's names on the tags since they will double as place cards. Of course I can't show any pictures so it's a surprise for my readers who will also be guests!

Speaking of my niece/flower girl, I just talked with her on the phone this afternoon and as always (believe it or not throughout our year-long engagement) she was greatly interested in hearing more about the wedding plans. She was asking to see my wedding dress a year ago before I'd even picked up a bridal magazine. She was very excited today to hear about the cake and the favours and told me she was really looking forward to the wedding.

Today I also did a practice run with my bouquet. I'm actually making the two bouquets and four boutonnieres myself since I felt I could do it. I don't know if it's a good thing or not but knowing so many crafts I just assume I can make anything. But I really don't know much about flowers. The style I like best is just tied in the middle with floral tape, then covered with a thick ribbon, then a thinner ribbon in a bow. I have special ribbons which I am saving for the real thing. I love white flowers but I wasn't sure they would work since my dress is off-white but I held up the bouquet next to it and it looks very nice. I wanted gardenias but I've heard they need to be wired because they don't have substantial stems. I do really like carnations though.

Here is a close-up picture. The final thing will be more carefully done, I just wanted to try it out generally. I will make sure the ribbon covers the floral tape. But I do prefer simpler, more natural-looking bouquets anyway, with just one kind of flower. I may add leaves around it though.
And finally how lovely do Blair and Peter look on their wedding day? I love her anniversary photograph too.

Read more...

Spadina House watercolour

>> Tuesday, August 29, 2006

I thought I was busy before but it's getting even busier! These days we've been doing chores most of the evenings. One frustrating chore (that thankfully Bradley is taking care of) is getting the permit to serve wine. It's involved five trips to the LCBO so far, with maps, forms to fill out and letters needed for five different places, including the fire department, police, city clerk, public health and building division!

And of course at the same time we're preparing for our two week honeymoon in France ending with a few days in London, England. I'm so excited to go to France, I've been to England a few times but never to anywhere else in Europe. We're spending five days in Paris, then visiting Lyon and thereabouts including the Alps! Bradley has been all around Europe and he's so great at making the arrangements.

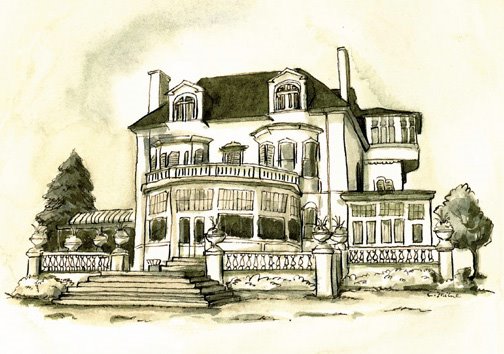
I get to do the creative things, such as the watercolour painting above of Spadina House which I used for our rehearsal lunch invitations. We've invited people to have lunch at the same place that is making our wedding cake, Dessert Trends. I did the watercolour using the photos I took back in April as a reference. Back then there wasn't much greenery yet so I added that in myself. We have a book about the history of Spadina House and I noticed in the historical photos that there were spiky plants in the middle of the flowers in the large urns and it's still like that today.

Read more...

Japanese Crafts book treats

>> Tuesday, August 22, 2006

Still not much time to make new crafts to post so I thought I'd share some pictures from my Japanese crafts books - I've been meaning to do this for ages! I'll try to pick pages I haven't seen on other people's blogs yet. I'll dedicate this post to Andrea, who loves cats so much :-).

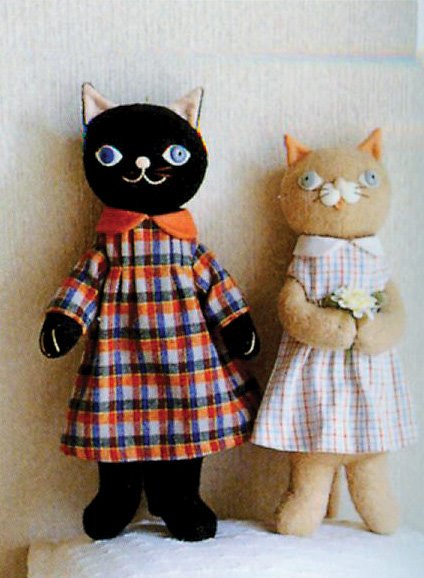
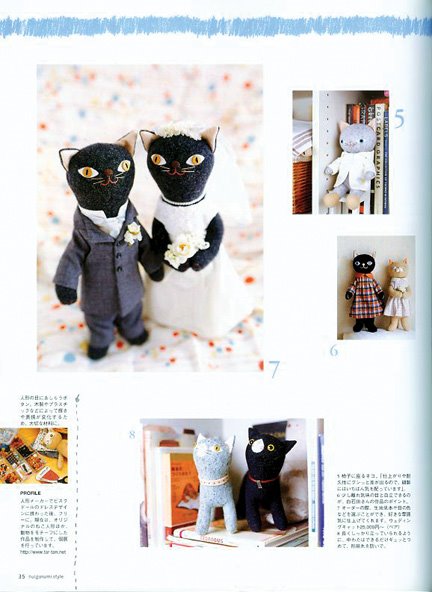
The first page I'll share in this post is from the very popular nuigurimi style, ISBN4-05-604179-2. This page is covered with some very charming cats. The pair at the top of this post are my favourites, I love the plaid dresses. I think I like the character on the left the best, she has marvellous colours and such a friendly sweet face. The picture below is a scan of the whole page, but I thought I'd show each picture close up since all the cats are so wonderful.The two cats below have such realistic poses - can't you just see a cat looking inquisitively up at you like that? I don't have a cat of my own but I've looked after tons of them. My favourite cat belongs to one of my girlfriends and his name is Bicir (pronounced Bidger). He's very clever and while he was staying at my house he learned how to climb up the ladder into my IKEA loft bed in about two minutes.
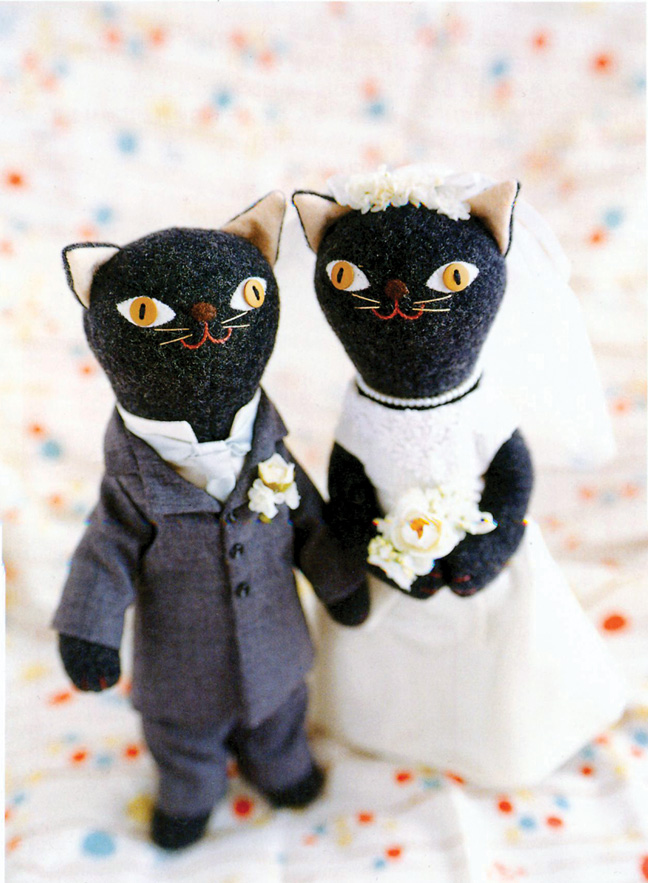
And finally, of course, I had to show the two cats getting married. What a handsome couple.
Well that's it for today - more Japanese craft book scans to come soon!

Read more...

Busy days

>> Thursday, August 17, 2006

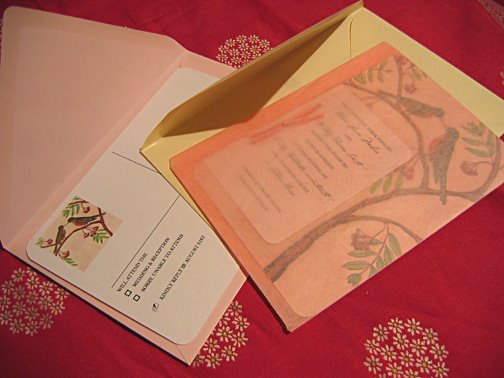
Things are very busy for me this month as I've taken on a full-time design/layout contract for August. And as most of you know I'm getting married in September. I haven't had as much time for crafts so I'll post more pictures of my invitation - as requested by one of my talented fellow illustrators, Paula. The outer envelope was cream, with a return address label that had part of the berries and leaves from the invitation. And yes, I am a nutter and I did make the pink tissue paper envelopes myself by hand. I've always loved cut and paste...
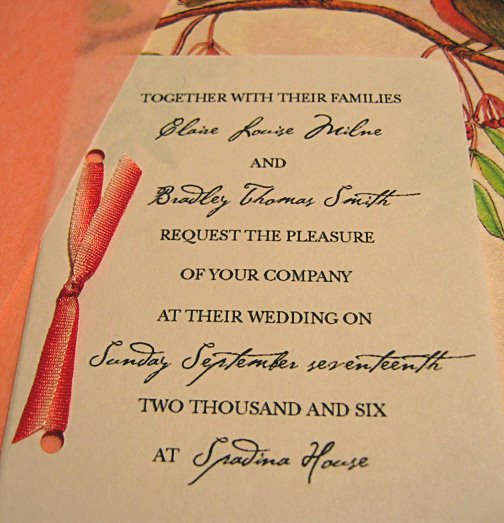
This is a close up of the text and the lovely ribbon we found to tie it to the card with. It was an embroidery ribbon from Mokuba on Queen West. While we were there we bought some brown gingham for the boutonnieres and found some dark pink grosgrain ribbon at another sewing store for the bouquets.

This is the back of the postcard which had a map, and underneath the card you can see a peek at the return address label.
The reply card was another postcard with a small detail of the illustration and room to write a note on the right side. It's been lovely seeing those pink envelopes in our mailbox! I added a little mailbox icon - we had just seen the movie The Lake House, and it reminded me of that. I liked that movie a lot... Did anyone else notice she had really really pretty applique cushions in her room? Similar beautiful cushions in The Breakup too - well, how gorgeous in general was their decor? I loved that wallpaper in their bedroom!
Anyway I'm rambling. Thank you everyone for all the nice comments about our invitations. It was definitely a labour of love and worth the effort.

And finally I am doing a little bit of knitting, I've almost finished my Peppermint Twist sweater. I'm doing the decreases for the first sleeve now and the front and back are done. I really like this pattern (from Debbie Stoller's stitch n' bitch book.) I'll be sure to show it off once it's finished!

Read more...

One last swap

>> Thursday, August 10, 2006

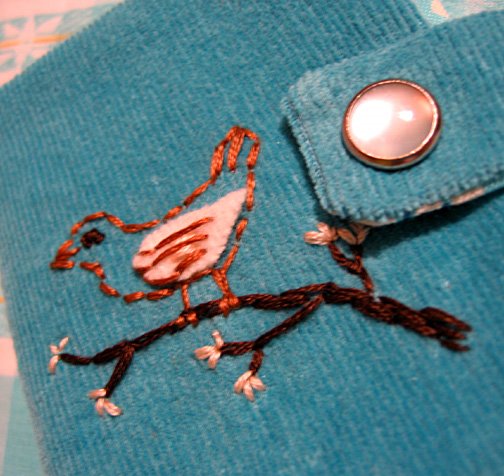
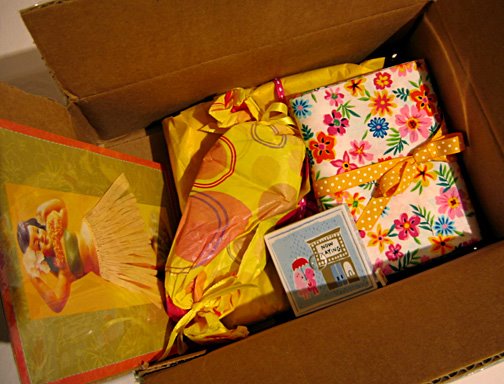
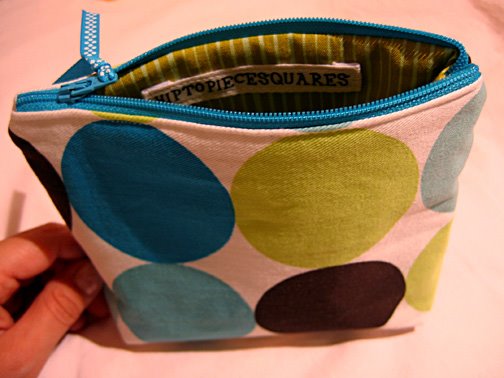
I realized recently I haven't done a swap in ages - it's been very busy these days - and in fact I probably won't have time for another until after our honeymoon. So this last swap was with Sarah (hip to piece squares) who agreed to swap her polka dotty circles pouch (above) for one of my bird needle books (below). I loved the colour scheme so much, such a great fabric, and then she had added nice details like the ribbon zipper pull. And I was dazzled by the extras in the package she sent me!This is the box of goodies she sent - I was so surprised because I didn't expect this. I just sent the needle book and some fabric together in a gingham drawstring bag (eep). We both sent two squares of fabric tied with a ribbon, but she sent so much more!This is the inside of the pouch - a great olive green stripey fabric:
These are the fabric squares:
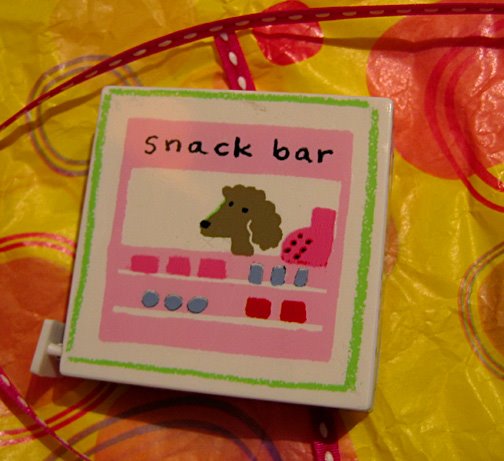
And I love this cute tape measure so much! The end of the tape has a tiny little movie ticket too. And notice the pretty pink ribbon in the background:
This is the back of the tape measure. Because what is a trip to the movies without the snack bar?And finally a little birdhouse set of chimes:
Thank you so much Sarah for the lovely package!!

Read more...

Wedding illustration

>> Thursday, August 03, 2006

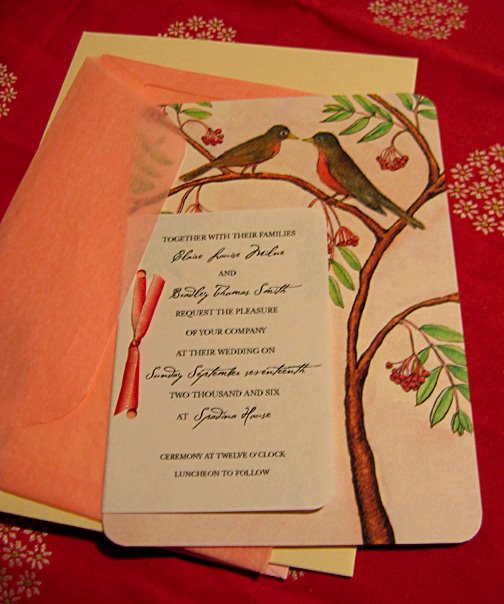
Well our wedding invitations have all been mailed so now I can share the illustration I created for them. It's another in my bird series. I chose robins because I love robins, I think they're so handsome and charming and I always like seeing them around. Like most birds they are monogamous, and they love to eat ashberries. Of course they like to eat worms too, but I thought an ashberry tree would be more picturesque.

The full design is like this:
And I had a white piece of paper over the top with the invitation wording on it, and a tiny ribbon that tied it in place. The invitation itself was in a pink tissue paper envelope, and it came with a matching reply postcard with pink paper envelope. It's been lots of fun getting those pink envelopes in our mailbox and knowing what it is!

It was very time consuming making them, but I've had lots of compliments and it was fun to do. Today I'm working on sewing my veil. There's not a lot of information about making your own veil online. So I've kind of had to work it out for myself. I could share the how-to with you guys, is anyone interested in that? Ok, back to my sewing now.

Read more...

Illustration Friday - topic: Clean

>> Wednesday, August 02, 2006

I think this one kind of speaks for itself. I made this watercolour as a spread to submit as a sample to Babybug, so this is a cropped version. I haven't worked out my poem for it yet. I haven't heard back about my Rainy Day poem submission to Babybug, but I did get a rejection letter for Sticky Food. Too bad... I'll keep trying though.

Read more...

Pincushion challenge - flowers

>> Monday, July 31, 2006

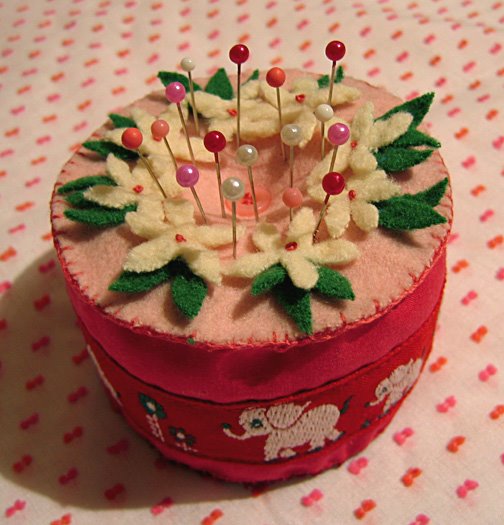
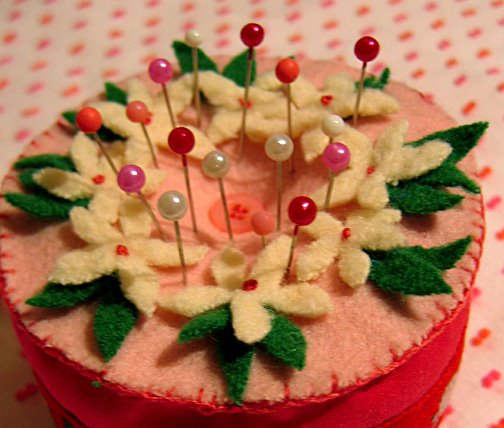
As promised here is my pincushion for the Pincushion challenge - just in time since it's the last day. The cylinder style pincushion seems to be quite popular - I've been wanting to make one for some time and this is my first one. It's a good shape to decorate with embroidery and appliqué. I have been inspired of course by the beautiful pincushions made by Bella Dia - so talented! and this lovely cake pincushion made by Sweet Pea. I didn't mean to copy Sweet Pea - but I think mine kind of looks like a cake too. It feels like a nice fat cupcake.

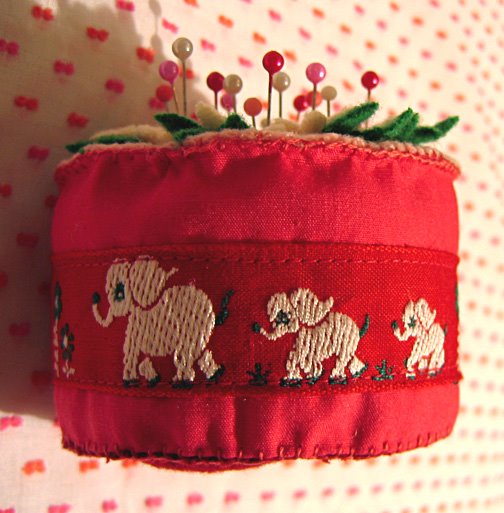
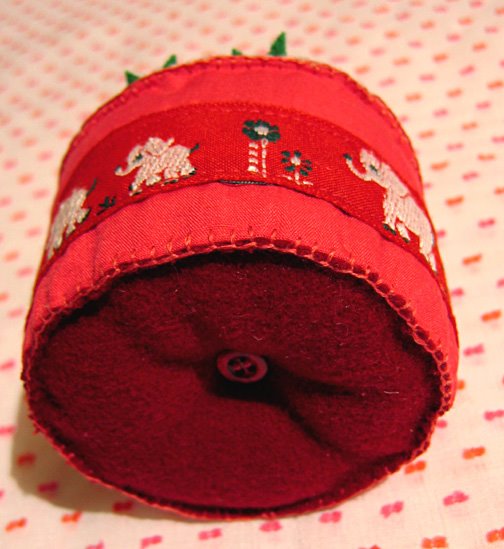
I made my pattern by cutting a rectangle, then tracing the circle it would make with a 1/4" seam allowance. The top is made from pale pink wool felt and the bottom is made from dark red wool felt. The side is dark pink cotton fabric - I used two layers of fabric so it would be thicker. It was also the perfect opportunity to use my charming elephant flower ribbon:The ribbon has flowers in white and dark green on a red background so I used those colours to decorate the top. The flowers and leaves are made from wool felt with pink embroidery floss French knots in the centre of each one.
I added a small button at the top and bottom so that I could pull in the centres and make the shape more stable The filling is just light poly filla and it was curving out at the bottom and the pincushion was going to be wobbly. Maybe next time I should add some cardboard at the bottom.I can't wait to see all the Pincushion challenge creations this month!

Read more...

Tropical print blue green weekender

>> Sunday, July 30, 2006

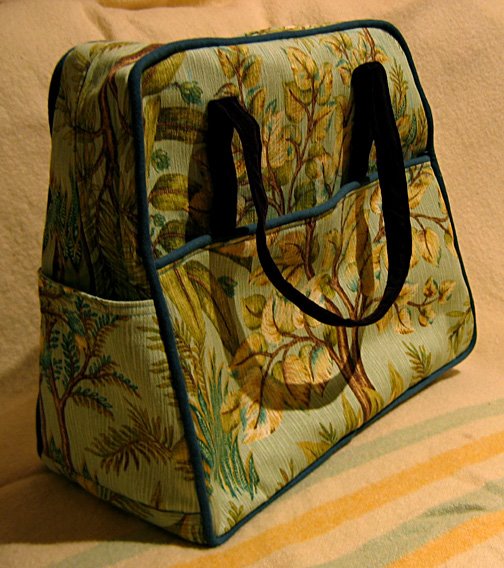
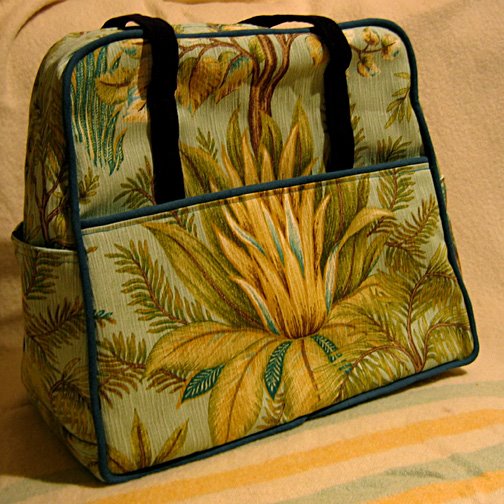
I haven't posted in a while - I've been busy with my main project which was making another Amy Butler weekender bag in a new fabric. I do like the other one but I got inspired imagining the bag in this fabric. I wanted to get it done soon because I had my heart set on having this cute bag for my carry-on for our honeymoon in September. Once I had used the pattern the first time I realized I could do it with less fabric than the pattern called for as long as I cut out the pieces carefully. Which means I could make it with some leftover fabric from my fabric as wall art.

A lot of people love this bag and want to make it, so here are some more tips:

  • you can find a place to buy the pattern using this page as a jump off point
  • I didn't have trouble with sewing through thick layers but I have an old Singer lockstitch machine and they are work horses. Very good at handling heavy sewing. The old sturdy Singers did the whole family's household sewing for many years
  • the second time is easier - you learn quite a bit the first time round
  • if you want to align the design on the fabric, cut out the main panels first, then align the fabric for the large pockets
  • don't make extra cuts in the fabric until you know you have enough fabric for all the pieces - you may need a long strip later on
  • chalk outlines from the patterns before cutting out to make sure you have enough
  • if you don't quite have enough fabric you can cut the top part in two pieces and attach them - I had to do that for one half of the top & side pieces and it's not very noticeable
  • you can add pockets to the lining before you assemble it - I added a zippered pocket on one side for papers etc.
  • attaching the lining can be time consuming - don't try skipping the tacking-it-in-place step though or it won't look as good at the end - it will be floppy instead of held in place
The two sides of my version are different. I did align the pattern - it is more trouble but I think it was worth it.
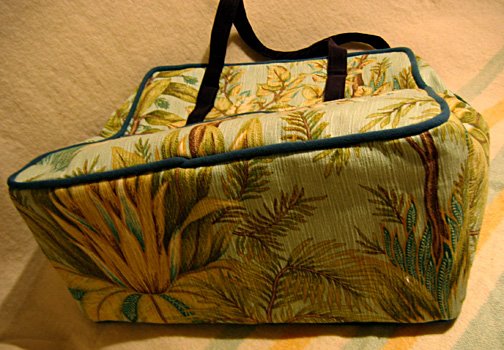
This is the bag from one side. The piping is a dark turquoise knit fabric and the handles are very dark brown corduroy.
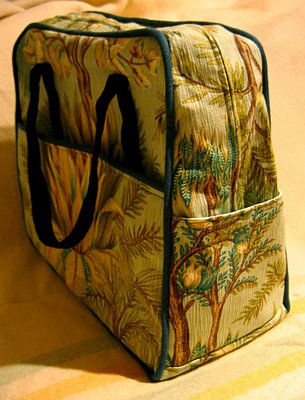
The lining is a pale turquoise.
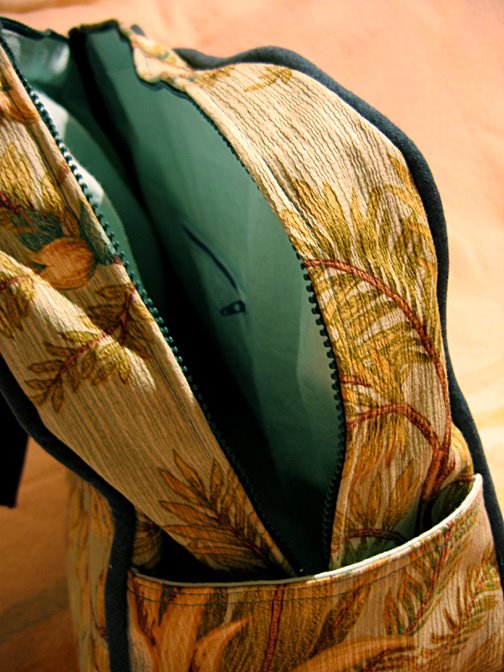
This is what the inside looks like - my zippered pocket is one addition I made that's not in the pattern. When I tacked the bottom part of the lining in place I found it easier to do with the bag inside out.
A view of the bottom:
And finally, a word about copyright issues. I'm passing this information on because it's something I learned more about recently. It clearly states on this pattern that you can't sell things made with Amy Butler patterns. And in some cases you will find out that this restriction applies to free online patterns too, and it may not always be clearly indicated on the pattern.

I found out to my chagrin that I shouldn't have sold my knitted bag without permission from the publisher of the pattern. I had an anonymous comment that drew my attention to this, so I wrote to Yarn magazine and was given permission for that one bag. I was quite worried about this so I thought I'd share the information on my blog so others can avoid making this mistake. The general idea is that while you own a copy of the pattern you don't own the design. There is an article about this at www.knitty.com.

While looking up copyright rules I also learned that the same restrictions can even apply to selling things made with copyrighted fabric! I found a good discussion of the issue at www.dioramarama.com so I won't go over it again. Needless to say I'm no expert so I probably won't be able to answer further questions about this - but searching on the internet will turn up lots of articles for those of you who sell your crafts and are interested.

I also recently learned that you aren't allowed to link to your shop from your Flickr pictures according to their rules. I discovered this after reading a discussion in one of the groups dedicated to hand crafted shop goods for sale. You can only have a link to your shop from your profile. If you have shop links on your pictures they can kick you out. It's too bad because I see so many wonderful crafts on Flickr and I personally love the opportunity to have the link handy and scoop some of them up in people's etsy shops!

So that's what I've been up to. Thanks so much to everyone for all the nice comments about my Amy Butler bag. This one is really worth the work. Coming up next: my flower pincushion for the pincushion challenge!

Read more...
Weekender sneak peek

>> Tuesday, July 25, 2006

Well it's not really a peek as such since the outside is finished. I still have the lining to do, and I'm planning on adding some pockets in there. I made a lining from the dark pink but I thought it was a bit too strong a colour so I've decided to switch to a light pink lining.

Tips in case you want to make one yourself
Timtex vs. Buckram
As you can see from the picture, the bag is the right shape and it stands up like that without anything inside. So it looks like the buckram works fine as a substitution for Timtex. I don't know exactly what Timtex is like, but it's probably more difficult to work with than the buckram. There were comments in the pattern such as "the Timtex may be difficult to fold" etc. and the buckram was fine. Also I didn't break any needles and I even forgot to switch to the heavy jeans needle before I started. Of course I slowed down a bit when going over the part where the cording comes out into the seams - where it was quite thick - but overall it just wasn't that difficult.

Materials

  • In case you want to make it yourself, I'll mention that I used much less fabric than the pattern called for. I do tend to snug up the pattern pieces so as not to waste fabric because there's really no reason to have gaps between the pieces you cut out.
  • I used two spools of thread and that included a reasonable amount of ripping out and resewing.
  • It was fine to use fusable interfacing whereas the pattern calls for non-fusable. For the bottom of the bag you insert an extra layer of Timtex (or in my case buckram) between the interfacing and outer fabric. So at that point you don't fuse the interfacing so as to leave a gap to insert the piece of Timtex. But after it was all assembled I put an iron inside the bag (which is quite roomy) and ironed the bottom to fuse the interfacing.
  • For the zipper of course you can use a separating zipper (instead of non-separating which can be hard to find) and just stitch over the end part.
  • For the cording it tells you to join up all the strips of fabric to cover your cording. But you only need four separate pieces of cording: one strip to go around each face of the bag and two smaller strips to trim the large pockets. So you don't really need to make one long piece of cording. As I mentioned before I used boot laces that were nice and round and 1/4"
Overall
This is a great pattern. I learned a lot while making it - such as the proper way to sew in a zipper and get those little flaps that cover it. As long as you take your time and just think about one step at a time it's not that difficult - I found the instructions and diagrams to be quite clear. Probably you should have some sewing experience. And finally it's bigger than I expected but we measured and checked the airline specs and it's just under the maximum size for carry-on luggage. Which is what I wanted it for. Overall I think mine is cute but not as nice as my birdy inspiration so I've been musing about making another one sometime...

Read more...

Now you really know I'm crazy

>> Friday, July 21, 2006

I made this crocheted hat a long time ago - it was one of my first posts ever - and I've been meaning to make a matching scarf for it for ages. I had the matching wool tucked away ready for when the right pattern came along. The main part is a shell stitch and I picked up stitches around the brim and knitted the bottom part.

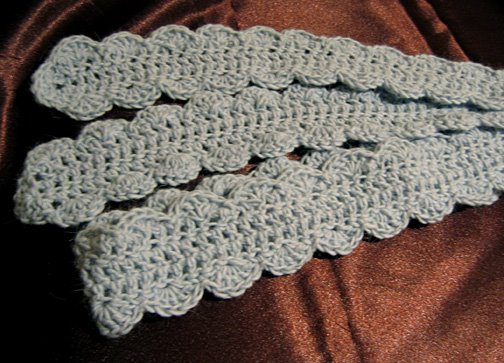
So while browsing through the new Stitch 'N Bitch Crochet: The Happy Hooker book I found the perfect scarf pattern - a scallopy scarf called the "one-skein scarf". So yes, even though it's been sweltering hot here I've been crocheting a scarf. While on the subject I would like to mention that I visited knitomatic (my favourite knitting store) recently to pick up some crafts supplies Hayley was giving away. It was one of those days that's 34 degrees and feels like 40. And while we were chatting Hayley was busy knitting away. So I'm not alone! p.s. thank you Hayley for the felt.

This pattern is so pretty and very simple. It's knitted sideways. I like designing my own things, but it's nice following a pattern sometimes because you know ahead of time how much yarn you'll need. I finished the scarf in two days.
Here's a detail:My WIP is the weekender bag and it took me a few hours last night cutting out the outside, lining and interfacing pieces. I still have the timtex pieces to do. That's right I still haven't even cut everything out! I do finally have all the ingredients though. I had more trouble than I expected finding the 1/4" cording since they had run out at Fabricland and a couple of sewing stores I tried gave me that "as if" look. You know when you ask for something and they look at you as if you'd asked for a cordless drill. I thought the dollar stores might have it - it's really just cotton rope but they only had nylon rope. Then I found some really long cotton bootlaces that looked just like the cord and came in 1/4"! Perfect.

Read more...

Summer tote

>> Wednesday, July 19, 2006

I think I'm procrastinating on the weekender bag...it does seem like a lot of work. The pattern seems to be quite clearly written with lots of details and if I work my way through step-by-step it should be fine. But there are a lot of steps and when you open up the big sheet covered with text and diagrams it kind of looks more like the instructions for constructing a rocket than a bag.

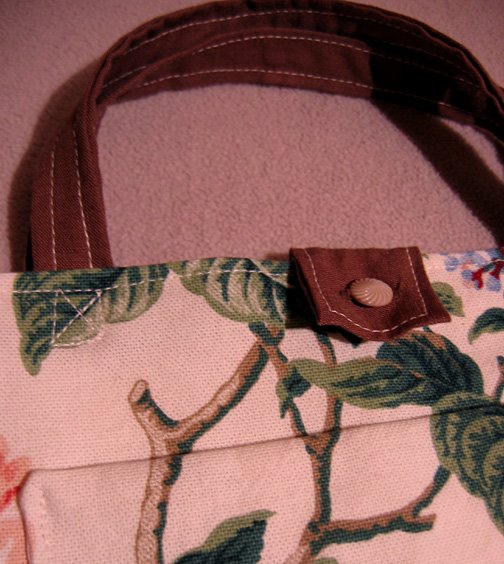
I almost have everything I need now though, so once I pick up the cording and thread tomorrow I'm going to get started. Really. Meanwhile I've made a tote with leftover fabric from my pillows. Which has gone right into my shop. (by the way I don't mean to sound like I'm constantly promoting my shop - but I can't stop making things and I'm running out of room... I'll show you a picture sometime but I have baskets and shelves and tins of fabric and ribbon and buttons tucked all over the place.) I even parted with a nice little vintage button for the clasp:
I like having white for bag linings - it has a nice summery airy look, and it's easier to find your things. Of course that means you have to wash it once in a while but as you know I prewashed the fabric so that would be no problem.
In illustration news I've almost finished the paintings for Cinderella!

Read more...

Summer pillows

>> Tuesday, July 18, 2006

Another small accomplishment! We have a neutral cream-coloured couch from IKEA - in the Karlanda style. It has three seats and an add-on at the end so it makes an "L" shape. And until recently it was covered with a real mish-mash of cushions.

I had made a set of four cushions at my old apartment with coordinating fabrics. Two of them had fabric with bamboo, palm trees and monkeys on it, and the other two were striped ones in the same green and yellow and red colours. I think it was a pretty charming set. Then later on I made two red cushions with lots of flowers and leaves in red, golden yellow and olive green colours. These had olive green cord trim. Then recently I made a simplified log cabin pillow that didn't go with anything. So altogether we had seven pillows on the couch. Also, not to be gross but I hadn't made the earlier pillows with removable covers so they hadn't actually had a wash in some time. Now I know how to make the pillow covers with the overlapping gap in the back so you can take them off and wash them easily.

Needless to say this was starting to look messy. Plus when you actually want to sit on the couch you have to move a few pillows around to get settled. Then recently I was browsing through some of my favourite decorating magazines - Canadian House & Home, and Style at Home - and I came across a photo that inspired me. It had a bed covered in neutral linens, I think they were brown and cream or perhaps tan and grey. And at the top were two pillows covered with floral fabric. And I thought it was such a great combination. Florals can be quite busy, but the cushions in the magazine looked so beautiful paired with the neutral linens and the overall look was quite pared down and serene.

I can't remember which issue I saw the picture in now, but I was happy with my own version. I made two plain white cotton cushions, then added the removable covers in the floral fabric. I had found a floral fabric I liked at Fabricland. I used to think (until yesterday I guess) that this kind of fabric was called chintz - but I looked it up and apparently chintz is a coated fabric that has a sheen. This fabric is a linen cotton blend without any sheen. In an effort to do things properly I prewashed the fabric and threw it in the dryer so it could be washed easily later on. I even ironed it. And I sewed the cover with French seams so the fabric won't fray.

And so now we have just two pillows on our couch, and it's quite refreshing. Perfect for summer when it's hot and you don't want any clutter lying around. Ahhh!

Read more...

Lining a knitted bag

>> Saturday, July 15, 2006

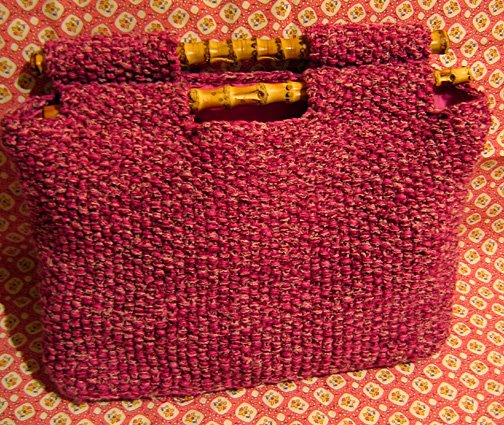
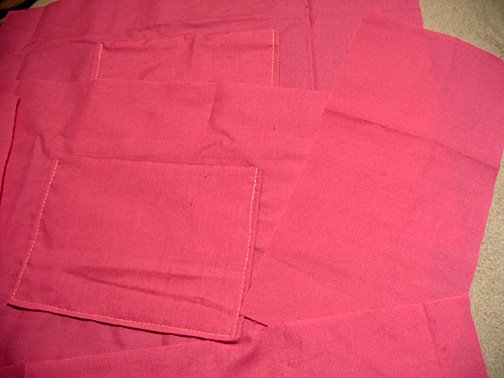
I made this bag some time ago from a great pattern I found at Yarn magazine. And by the way, how wonderful is that cover image with the yarn "tea"? I love it! And what a great pattern. For this bag, you knit the bottom panel first, then knit up the sides until it's as tall as you like, then add the tabs for the handles. The bottom part has an extra layer, so that you can sandwich some plastic in between to add structure to the bottom. Also it ends up being sturdier with the two layers. I cut out a rectangle from the lid of a tub of salad greens. I love the yarn they used in the pattern, but ended up using the custom cotton yarn I made in Montréal. Here's a view of the bottom:Anyway, after knitting the bag I put it aside for ages and I finally got around to lining it. And as promised I'm going to explain how I did it. First I measured each side of the bag and added a seam allowance. I cut out a front and back piece, two sides, and a bottom panel. Then I sewed some small pockets to each of the sides. As usual I made two squares sewn together so the pockets don't have any rough edges that might fray.
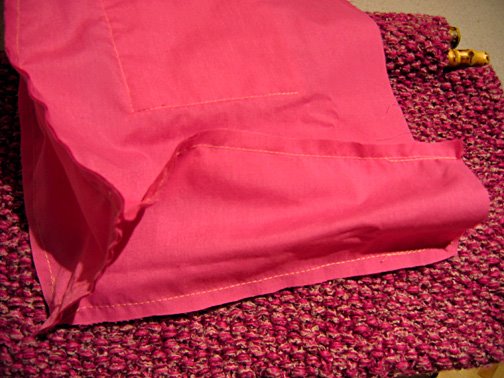
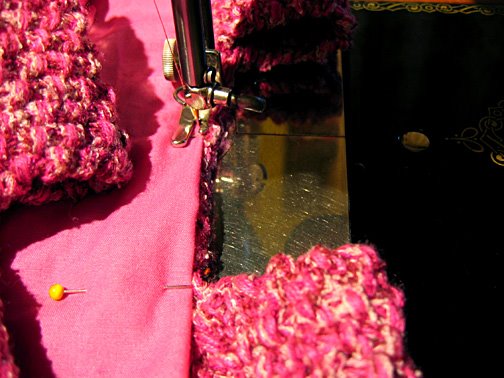
Then I sewed the front, back and sides together, leaving a gap the size of the seam allowance at the bottom of each seam. That's so when you add the bottom panel on, it doesn't get all puckered. Then I pinned the bottom piece on and sewed that on, sewing each side one at a time. This is what the lining looks like once it's done:The final step was to join the lining to the knitted bag. I usually sew cloth to knitted things with the cloth at the top, so the knitted part doesn't snag against the foot on your sewing machine. And that's it!
Generally a lining is a good idea because sharp things like pencils can poke through knitted bags, so your things are safer with a lining. Also it's an opportunity to add some handy pockets. Here's a view of the finished bag from the side:
And to give a sense of the size:

Incidentally, here's the post with info about the yarn I used for the green bag - I had a new comment recently asking about it.

Read more...

  © Blogger template Simple n' Sweet by Ourblogtemplates.com 2009

Back to TOP